
Aircraft Spruce Canada
Brantford, ON Canada
Corona, CA | Peachtree City, GA
Chicago, IL | Wasilla, AK

 Homepage - Share Your Building Stories
|
|
SHARE YOUR AIRCRAFT BUILDING STORIES WIN $500 |

PREVIOUS | NEXT PAGE |
|
|
|
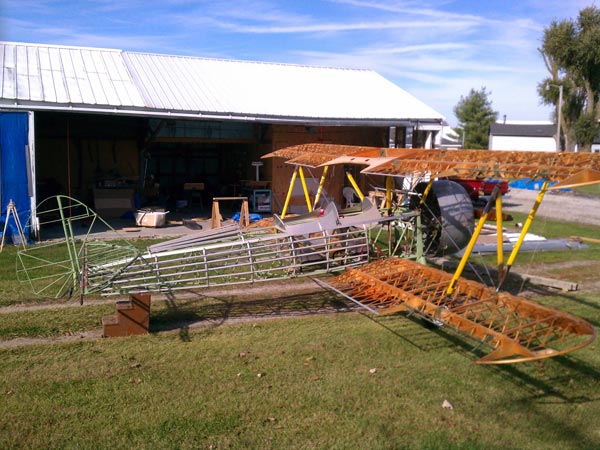
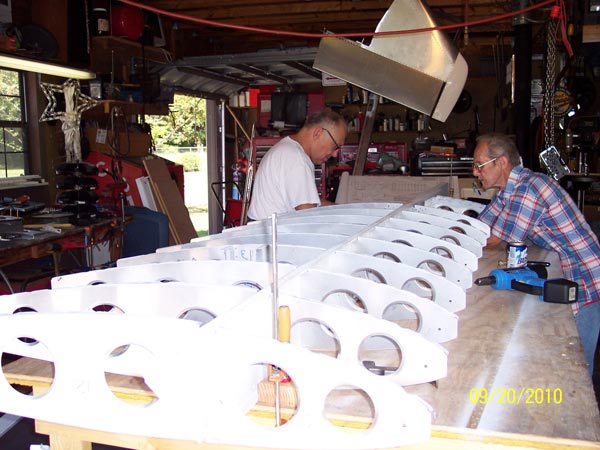
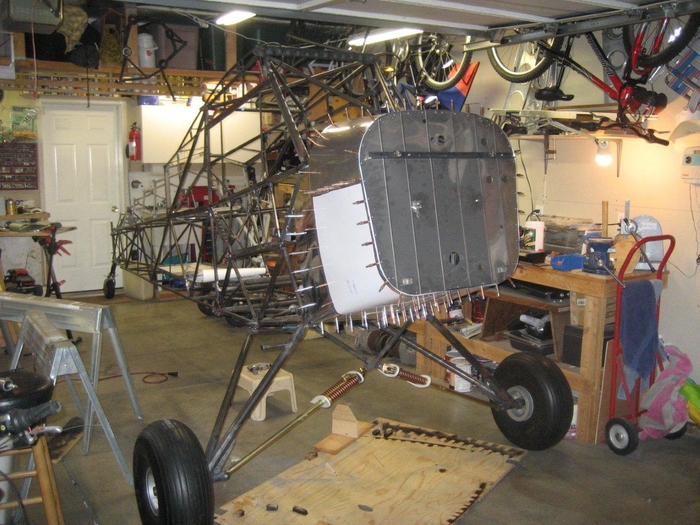
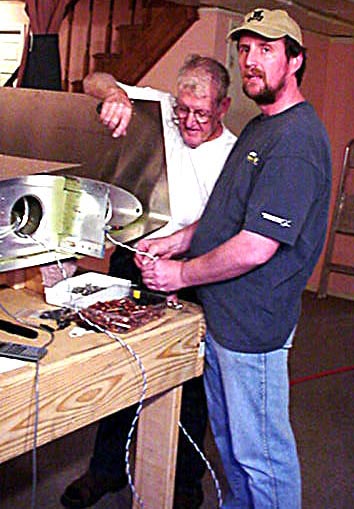
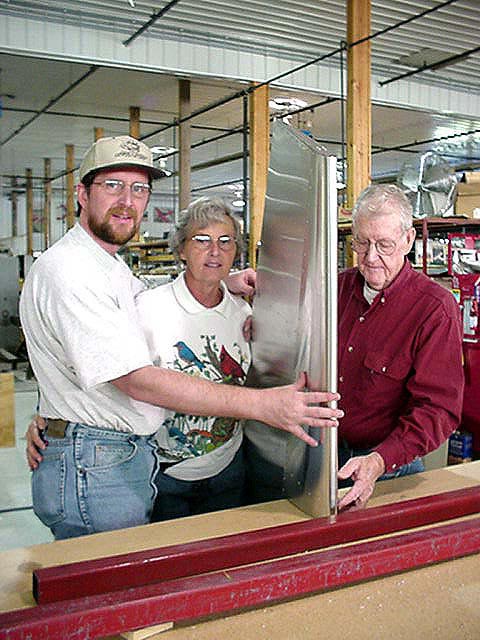
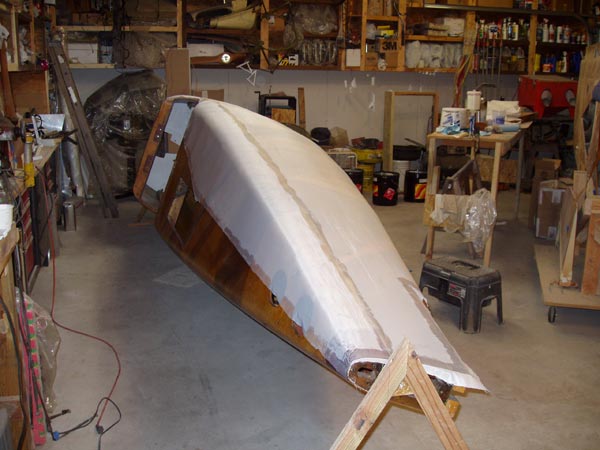
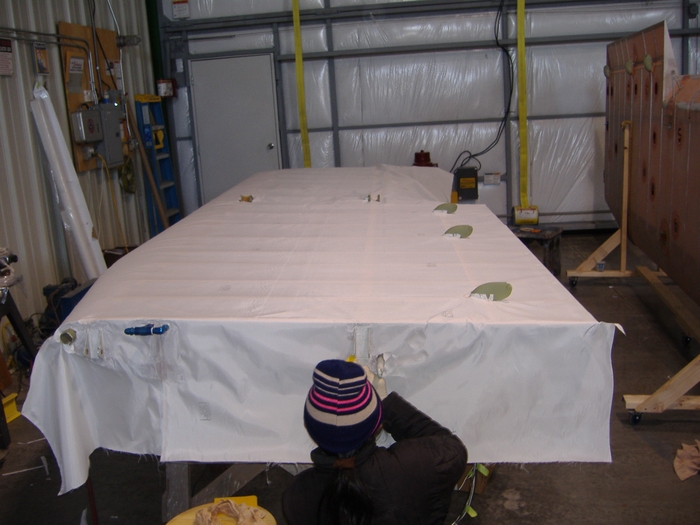
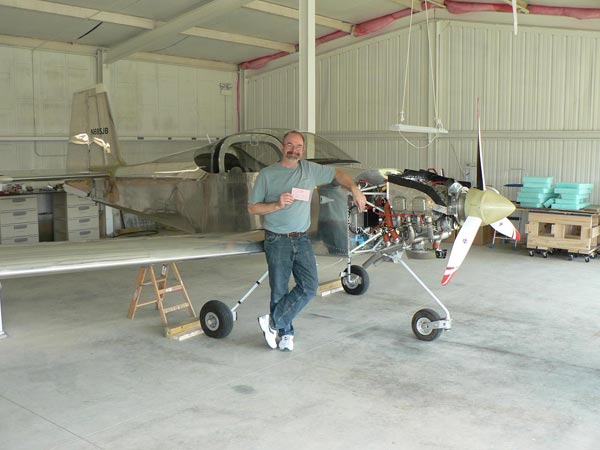
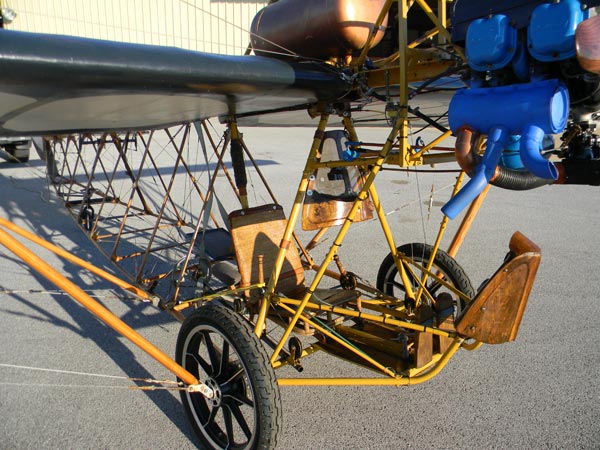
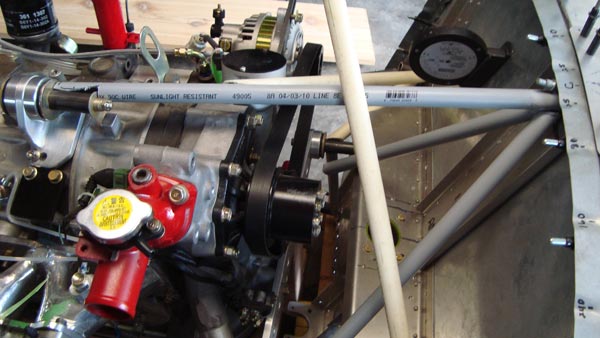
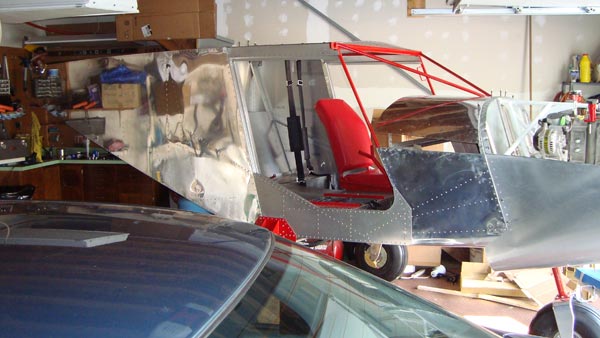
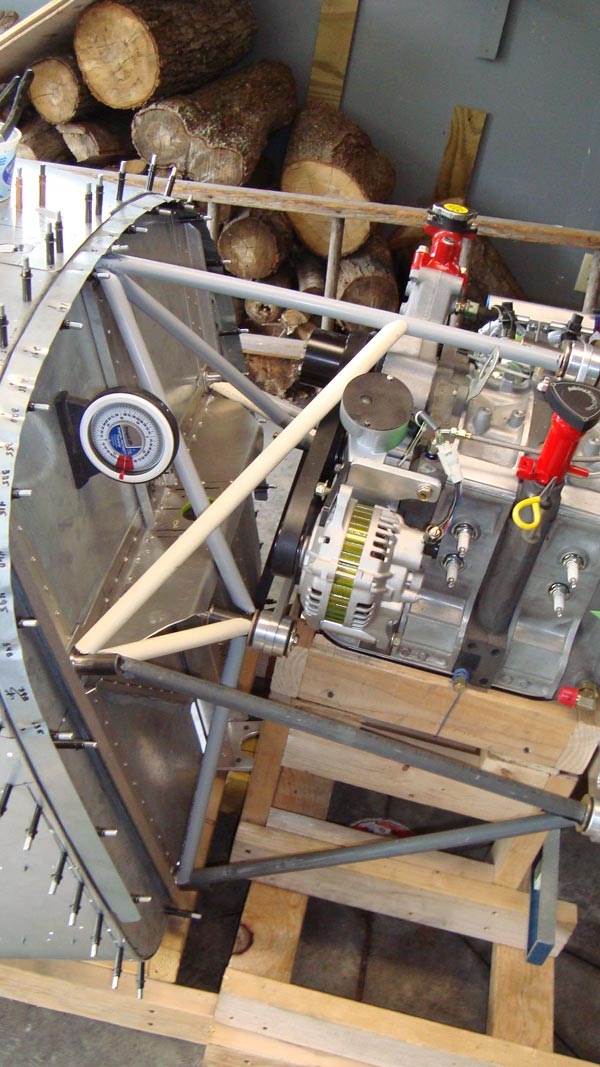
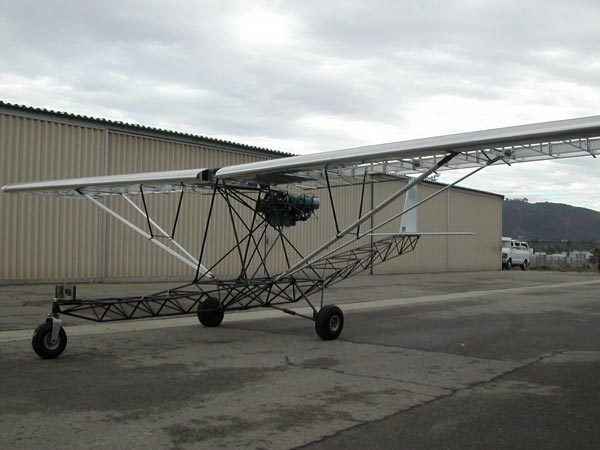
Custom BiplaneHere in Ohio we have a custom biplane underway. The airframe is modeled after the Stearman biplane, and is approximately 80% size. The engine is a stock 225hp Lycoming R680. While most of the fuselage and wing structure is in keeping with the Stearman design, there are influences in design and construction methods from many experimentals incorporated. Many changes were made to construct the plane with flat fittings in place of the castings used on the stock plane. Also cost and simplicity have influenced the wing build. For example, the wings are cross-braced using rods that pass thru the spar and are braced against maple blocks as found in Pitts or Skybolt experimentals. This eliminated the use of 64 clevis's and the fittings they attach to. Safety in operation and ease of maintenance have been considered in the selection of some parts. For example, the 1940's Hayes wheels and brakes have been given up for a set of Cleveland wheels and brakes from a C310. I'd like to travel far from home with this plane and parts availability is important. In some areas that make a Stearman unique it is a goal to acheive a level of authenticity. The tailwheel is one of these areas and it will feature a trunion, strut and knuckle in scale and will include the use of a smooth contour tire. There is much work left to do and much to learn in the process, but i plan to enjoy the build and the end result. Thanks to Aircraft Spruce for the great service and materials they've provided. Dan Johnson |
||||||||||||||||||
|
|
|
SonexJust a few years ago I started to think about building an airplane. Then the economy turned south and I had scale down my thinking a little and along came SONEX. They had a deal that you just cannot refuse. An airplane that gets over 40mpg, uses about 3.5 gallons an hour, is fully acrobatic up to 6G's and you can take the wings off when you are done and take it home! Well we started work Feb 2010 and coming up to 2 years now. With an ambitious schedule we thought Fall of 2011 and it came and went just too ambitious with being home only 2-3 days a week. Even with Larry the "premier" Navy trained Metalsmith, who definitely knows everything there is to know about aluminum we didn't cut any corners. Then Winter seemed to look like a good time and the rework we had to do to fix some clearance problems on the tail made that time frame slip away (yeah I should have waited for Larry to come over but drilled some holes without enough bolt clearance and we had to redo it all). Here we are sneaking up on Springtime and I am beginning to believe maybe early Summer. Throughout all this we have been depending on Spruce to keep us going. I wish we could foresee all the nickel-dime parts we were going to need but we can't. Every time we need something we have come to depend on the VERY quick shipping of Spruce. Needless to say the shipping rates help a lot to! It's no fun to pay $3 for a 20cent bolt, so we don't. Lower shipping prices at Spruce have and will keep us coming back. Hopefully we won't have to buy too much more before we are done, but come Summer I hope to take to the Friendly Skies of my own. Berny A Foerster |
||||||||||||||||||
|
|
|
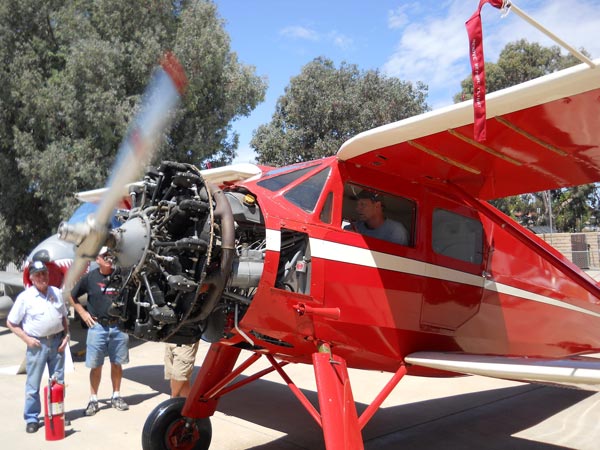
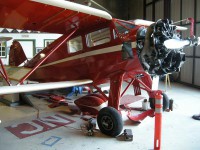
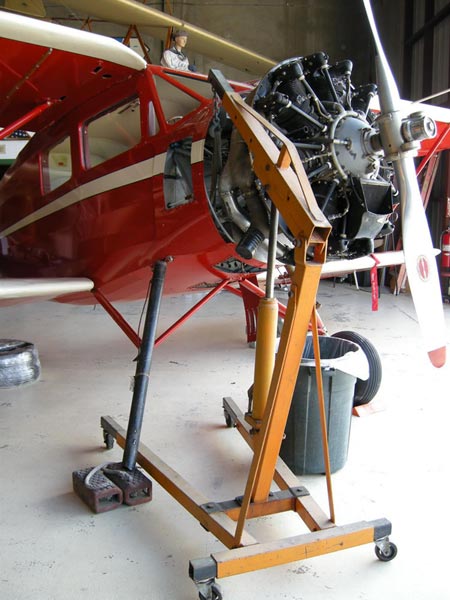
The Waco YKS-7I am a big fan of vintage aircraft and War Birds as well. That is why I volunteer 4 days a week at the Midway Museum and San Diego Air and Space Museum. Previously I assisted with the restoration of only static aircraft. Then the opportunity arose to "annual" the Waco YKS-7. It last flew 23 years ago after a restoration by San Diego Aerospace volunteers at that time and the Museum wants to fly her again. What a great aircraft from the golden era of aviation. We started the "Jake" a few months ago and one of the original restoration volunteers was on hand to see her run again after so many years. I need to offer a personal thank you to this person, Mr. Frank Huttle, who flew C-47s in WWII. He also taught me to cover planes and deal with many other issues surrounding old aircraft. Thanks for your help Frank. The Waco required the replacement of a number of solid and flexible fluid lines, tires, tubes and seals as well as a lot of the wing hardware. I could count on Spruce to deliver in a timely manner. Thanks Spruce for being there when I needed you. Regards, Mark Albert |
||||||||||||||||||
|
|
|
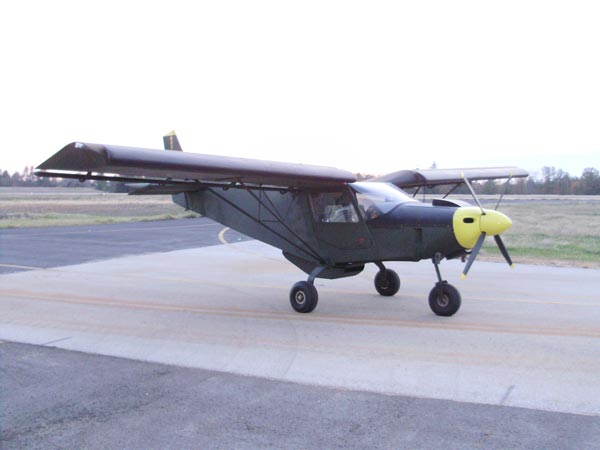
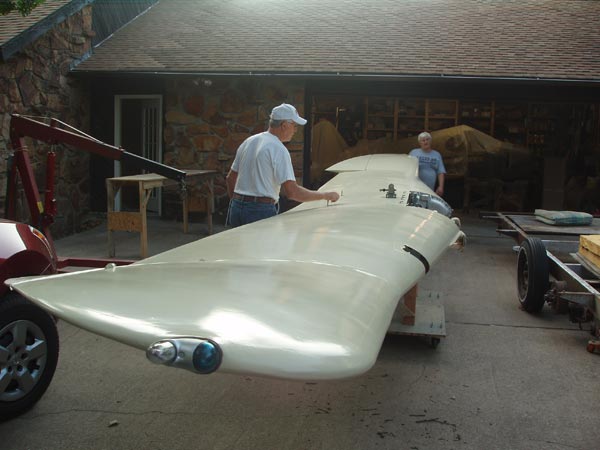
STOL 801 (A Wife's Story)Let's see, this all happened in the Summer of 95......while on a trip to Alaska. Just the 3 of us. My husband, his childhood friend (Bill) and myself.
We went from one end of Alaska to the other, or a great adventure,
stopping to see wildlife, J3 cubs taking off on grass strips, and the
float planes that were in majority. So, when we got home, I started the search.......literally.
We purchased a Beaver 550 Ultralight from a guy in West Texas
and had the greatest time, learning and playing.
Well, that is still in "our family", but things change as they always do.
In the Summer of 2004 he was searching for something more,
and we found it. It is lovingly called "the other woman", and he still tinkers,
moves, replaces, adds things to her. But every evening
when he gets off work, and the weather is good, you can
almost bet he is at the airport, flying high. Laura Wilson |
||||||||||||||||||
|
|
|
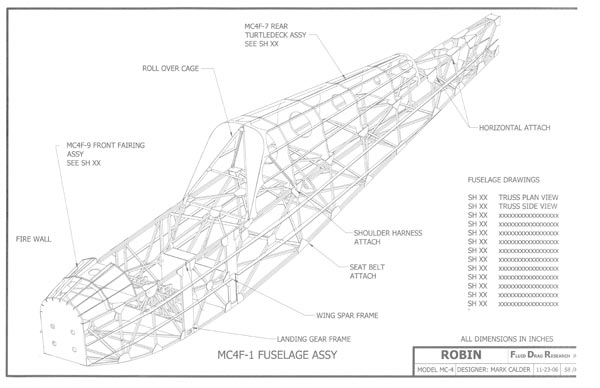
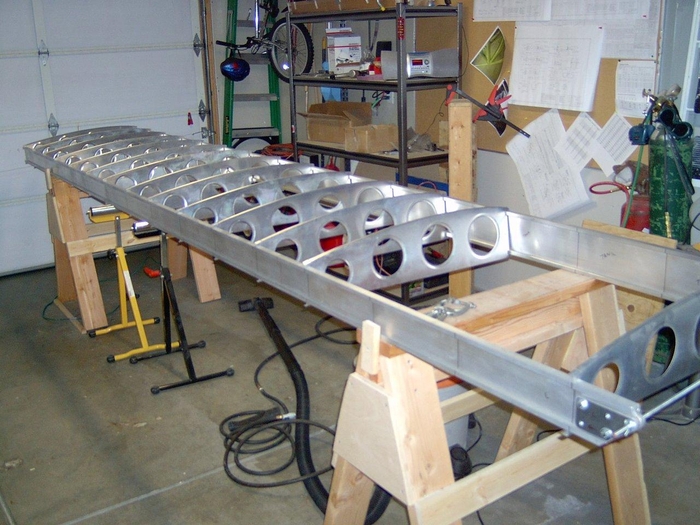
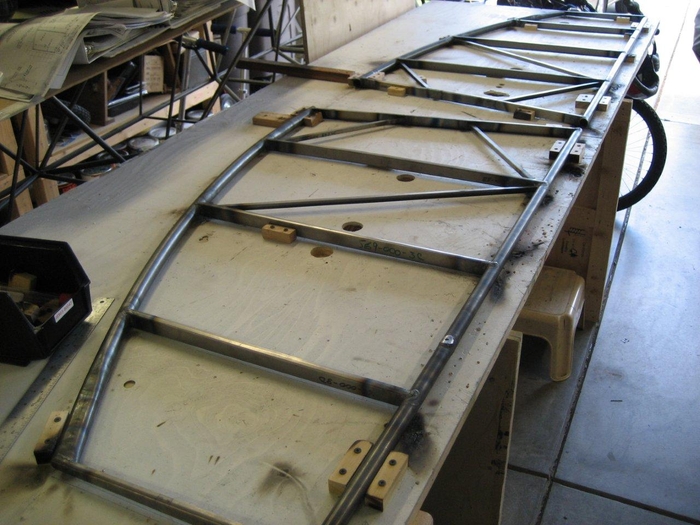
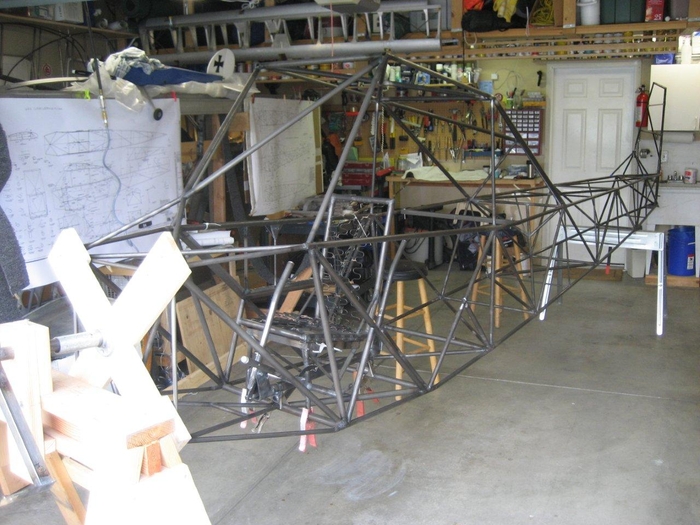
The RobinDear Sirs, I wanted to send along some pictures of my project the Robin. You have been the supplier for 95% of my material. I am using carbon pultruded sections that I can only purchase from the original vendor in the lengths I require. On more than one occasion in my blog, http://robinultralight.blogspot.com/, I have mentioned that between Aircraft Spruce and UPS I am working with the two most efficient businesses I have ever dealt with. On more than one occasion an order placed on Monday morning has arrived at my shop by the close of Business on Thursday. That is excellent service!!! I am the designer of the Wren Ultralight that was in production in Wichita, Kansas back in the early 80’s. I started on the Design of the Robin 5 years ago and officially started construction 2 years ago. I use the Aircraft spruce manual as my parts source. Generally if it cannot be found in your catalog, I will redesign. Most of the structure is designed to be built from plans. I have always assumed I would ask you to handle the materials kits. I am in the process of finishing the covering and I anticipate I will be ready for first flight next month. Thank You, Mark Calder |
||||||||||||||||||
|
|
|
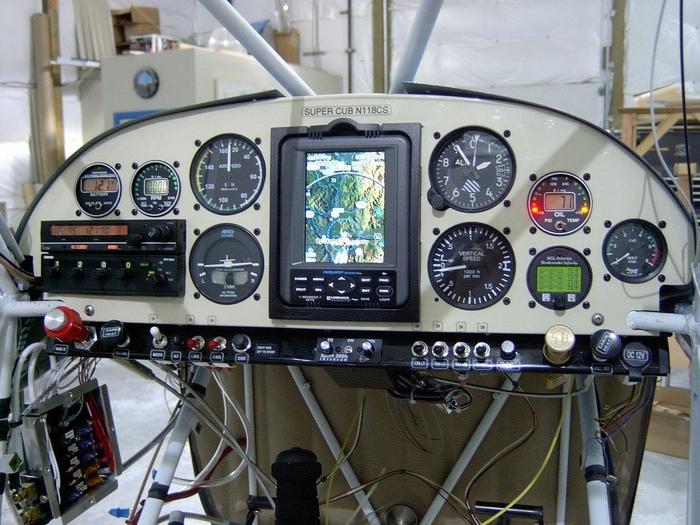
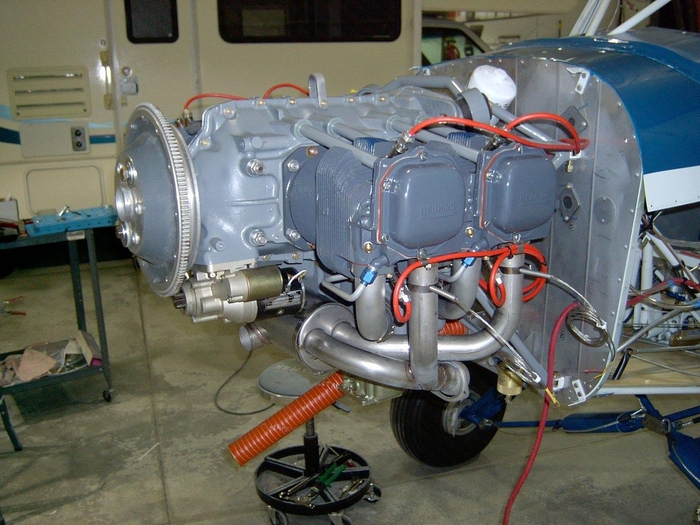
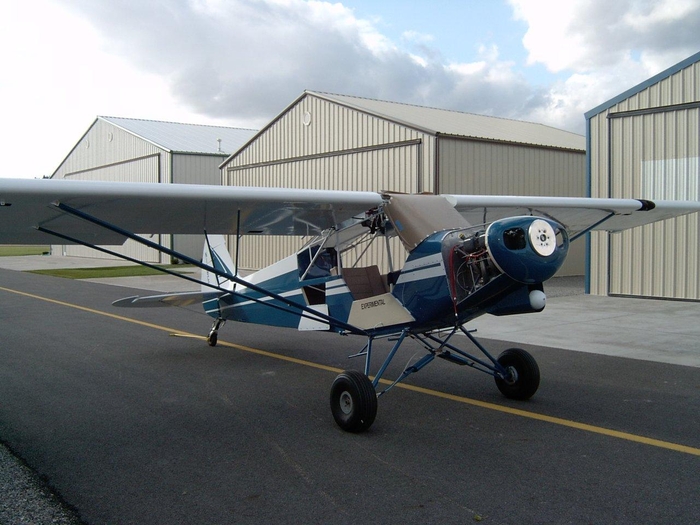
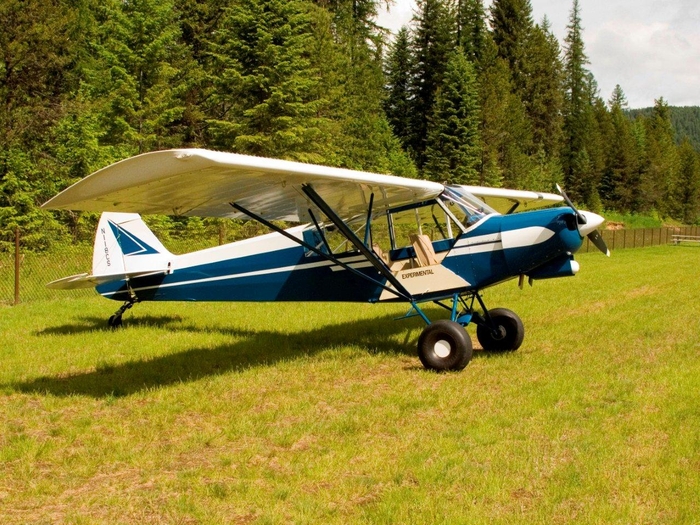
Super CubAfter years of being a renter pilot and dreaming of owning my airplane, my experimental Super Cub came to life with a first flight on January 2010. My Cub was scratch built over a 5 year period. I wanted a durable sport+bush plane that I could get the most versatility with and had delightful flying qualities. What else could there be besides the Super Cub? While I was building my airplane there was a package arriving from Aircraft Spruce what seemed like every week. I appreciated Aircraft Spruces easy online ordering, vast offering of parts, and discount pricing. My Cub is powered by an Lycoming 180hp engine that was rebuilt by me with help of A&P friend. I now have over 160 hours on the airplane and it is everything I had hoped for. You will find my Super Cub in its element at many NW fly-ins and back country airstrips throughout the Washington/Idaho area. I am currently building amphibious floats for it. |
||||||||||||||||||
|
|
|
Nieuport 28 replica Hi I have just finished the construction of a Nieuport 28 replica
You can see the video on you tube on
Construction of a Nieuport 28
|
||||||||||||||||||
|
|
|
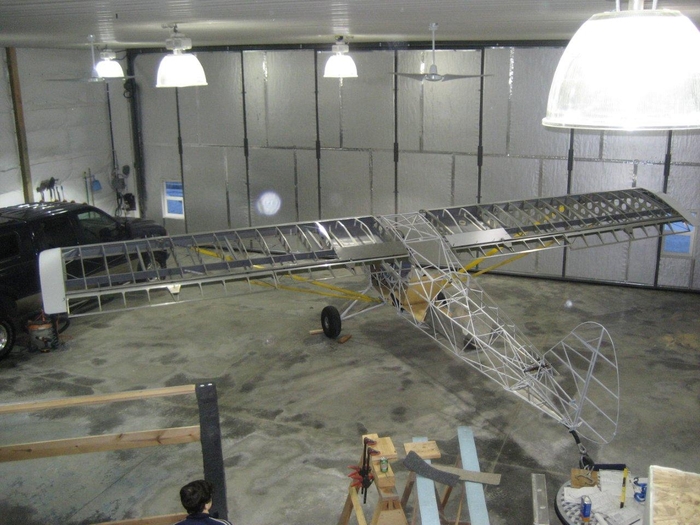
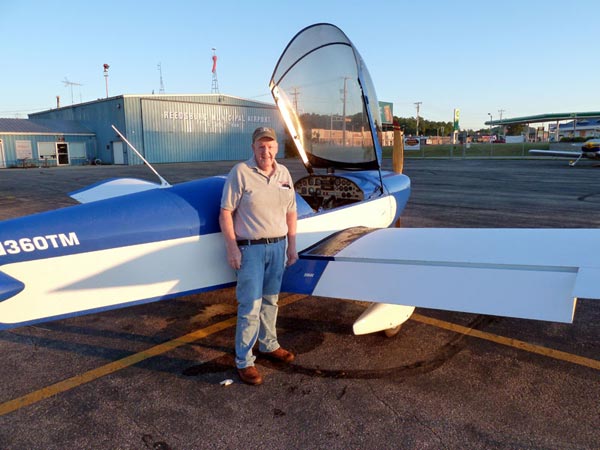
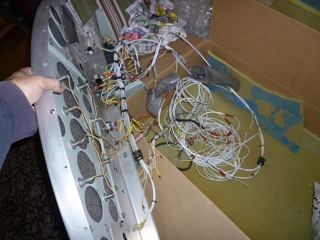
ZENITH ZODIAC XLMy Building Story is of one of making up for lost time. My dad retired from the U. S. Air Force in 1977 after 20+ years serving as an aircraft electrician. While I was growing up, dad was deployed away from home 3 times for a total of three years. The first time was during the cold war (while I was a baby) then twice during the Viet Nam war while I was in grade school, then while I was in high school. I missed him quite a bit. I have always loved airplanes. Growing up on Air Force Bases didn’t or did help, depending on your view. I worked continuously toward my dream job of designing advanced aircraft (30 years in the industry so far) and I knew I would build my own aircraft someday. I started in 2001 on a Zenith Zodiac XL. Mom and Dad went with me to the rudder workshop and we completed the rudder in a day and a half. I started in the basement and Mom & Dad helped when they were here. They moved close to our home about the time we moved the subassemblies to the airport hanger for final assembly i.e. the second 90%. I worked my “day job” then they would meet me at the airport for 3 or 4 hours more working on the homebuilt. Those hours were spent riveting, installing systems, engine work, fuel work and all the things we do to get the 800 lbs of aluminum ready to fly. My electrical system is top notch and every bit as good as the F-4 Phantoms, B-52 and many other Air Force aircraft dad worked on while he was gone. Except this was OUR aircraft. After 4 years, 11 months and 2 weeks, N360TM took to the sky. Mom and dad were right there sweating bullets but not showing the stress. The first flight was so successful that I made a second flight later that day. Later, Dad was the first person to fly with me in the plane after Phase 1 testing was complete. 5 years now of test flying, $100 hamburgers and two trips to Oshkosh have more than made up the lost time. The culmination was this years Airventure 2011. Dad flew with me in to Wittman Regional Airport for the first time. We had been going to Oshkosh off and on for the last 20 years but this was the greatest time. Dad shot some great video of the arrival at Runway 27 opening day morning. We taxied the plane to the ConocoPhillips Square for the “Zeniths to Oshkosh” celebration for Chris Heintz. We were standing there at the center of the homebuilt world with the plane we built together. It doesn’t get any better than that. Thanks Dad! |
||||||||||||||||||
|
|
|
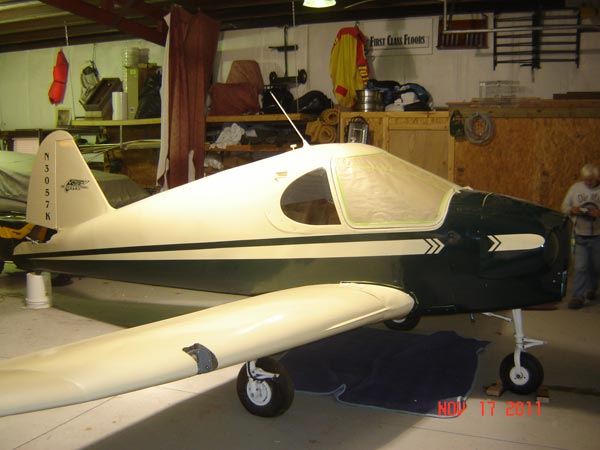
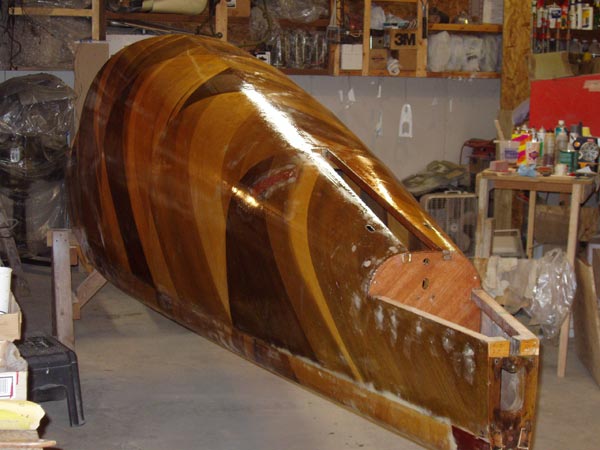
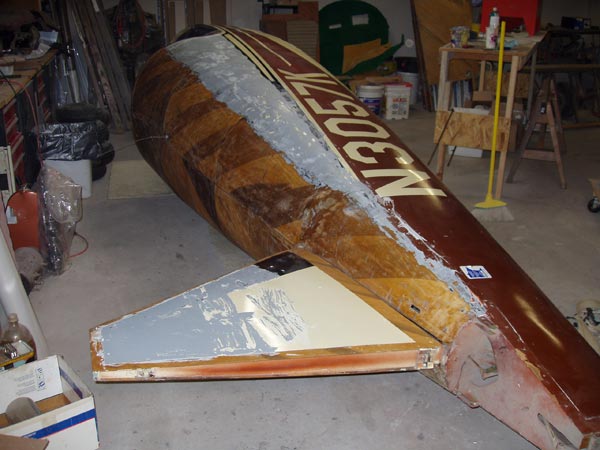
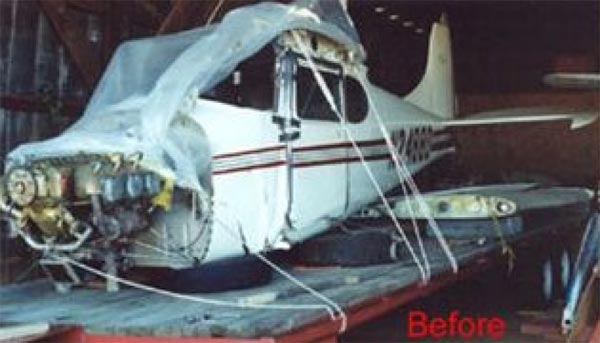
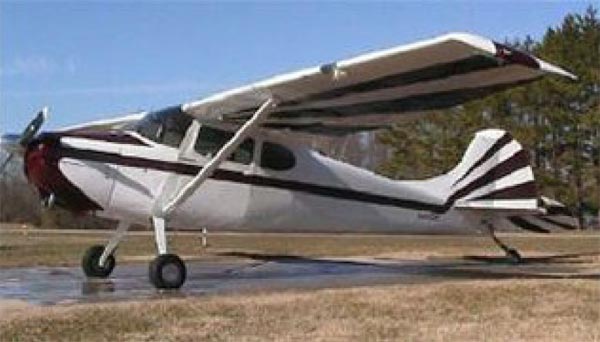
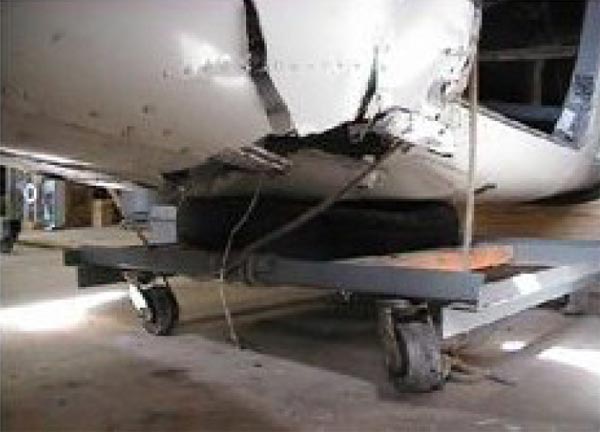
1946 CULVER VI purchased my project in 2008, a 1946 culver V, N3057K. The craft had been landed gear up and not flown in over 20 years. I retrieved it from Lake Elmo Minnesota and trailered it to Sand Springs Oklahoma. Removing the engine and tearing it down for a prop strike I ended up installing the O200 crank STC from Aircraft specialties in Tulsa Ok. The enamel paint on the craft was cracked and peeling in spots so I stripped the paint off down to the wood. Inspection revealed a few cracks and several spots of wood rot in the wood on both the wings and fuselage. They were repaired and the entire airframe varnished with poly fiber epoxy varnish. Finishing was done by covering all plywood with glider cloth and using the poly fiber finishing process. Most of the materials used in rebuilding N3057K were purchased from Aircraft Spruce. Final assembly is now under way. |
||||||||||||||||||
|
|
|
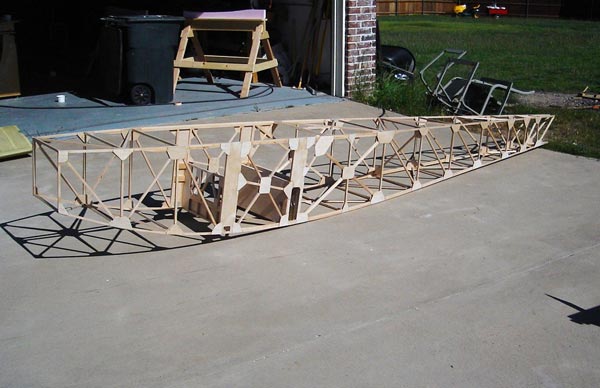
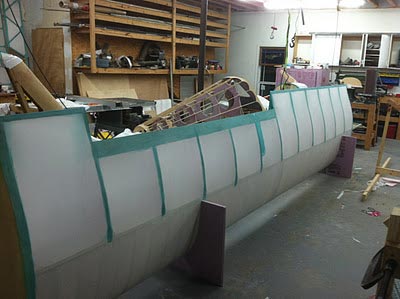
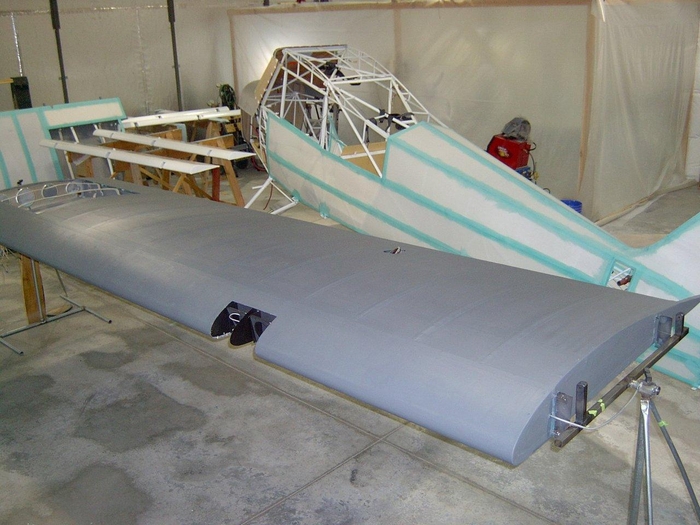
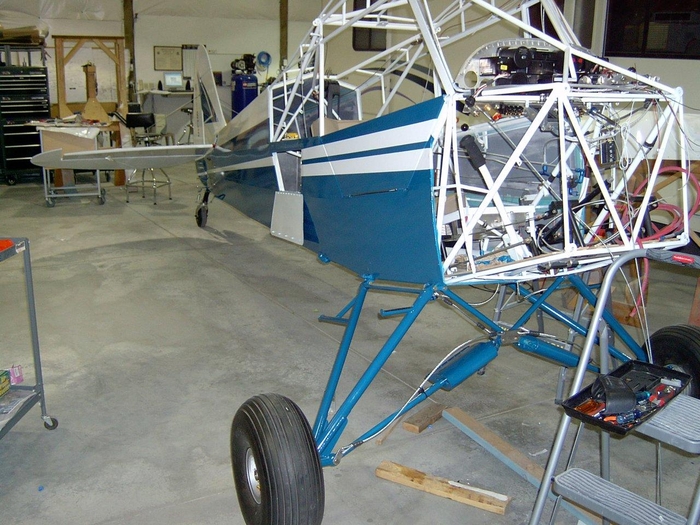
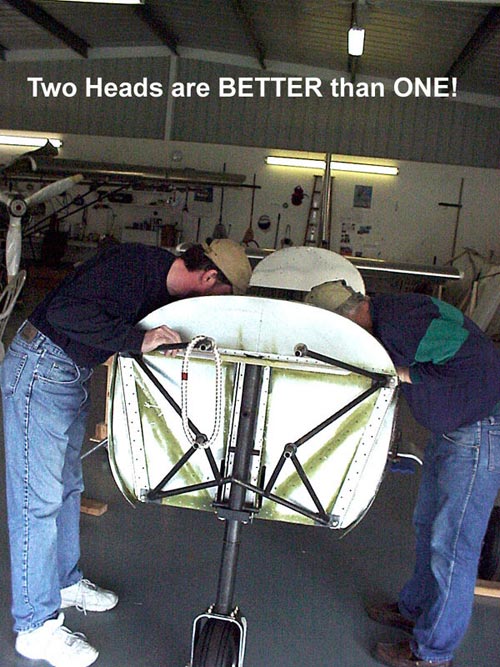
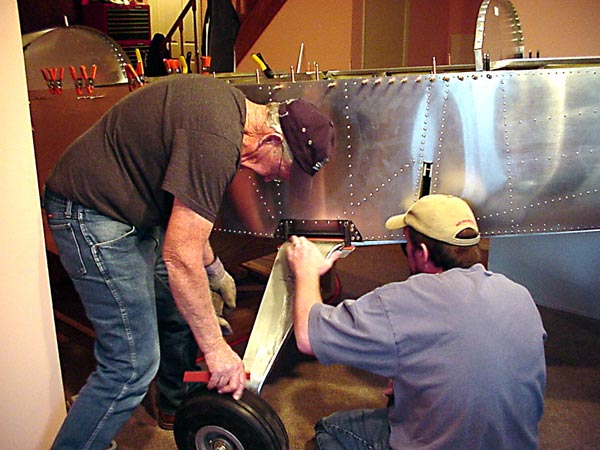
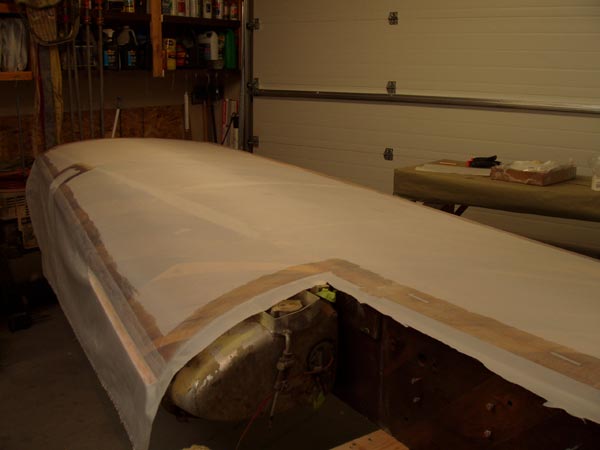
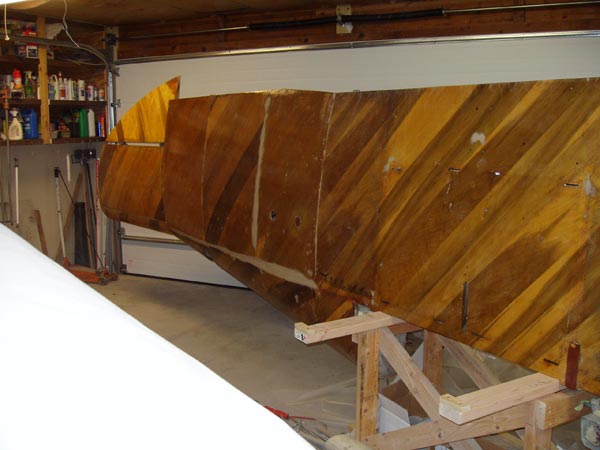
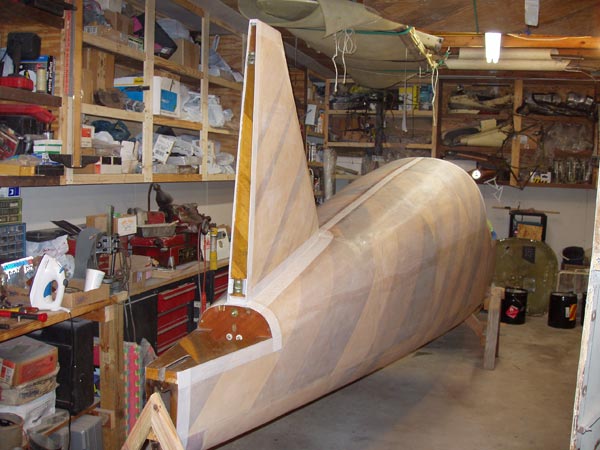
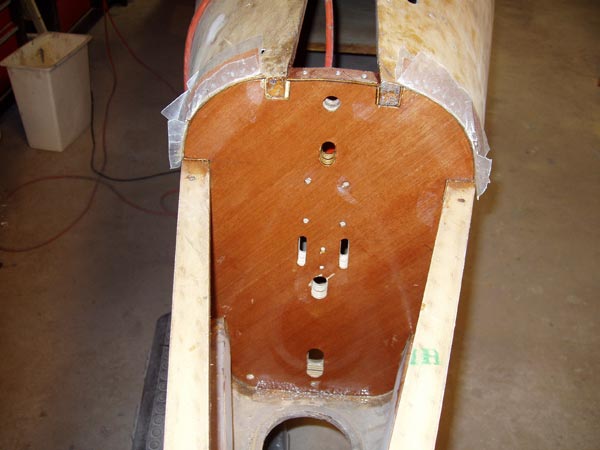
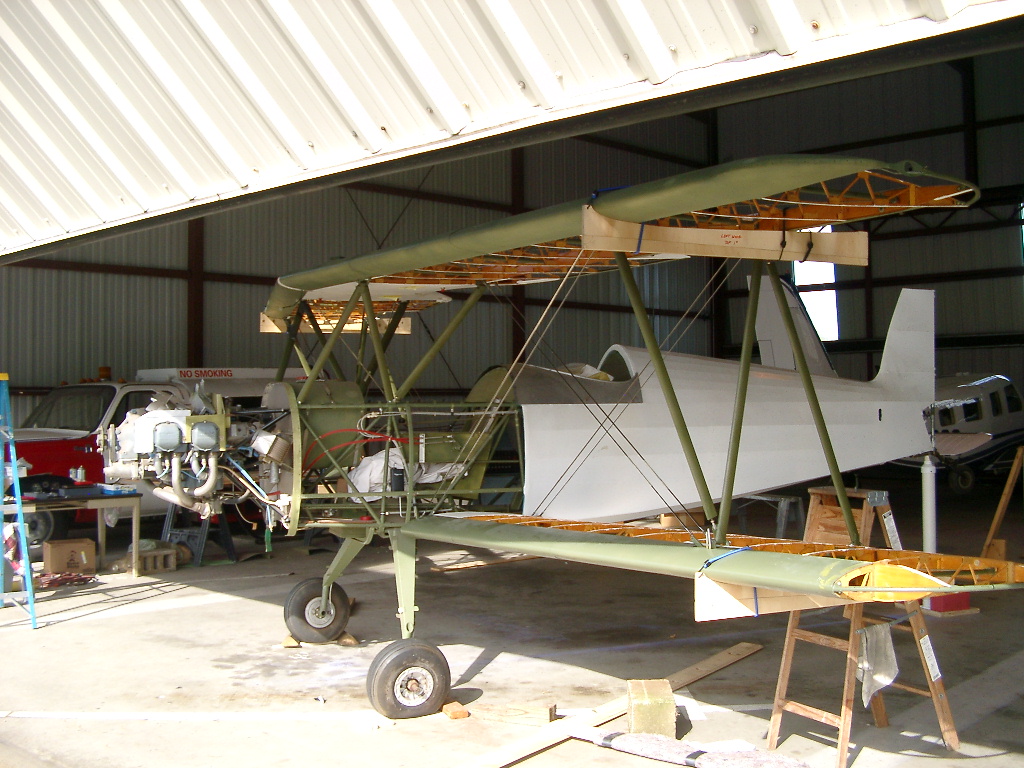
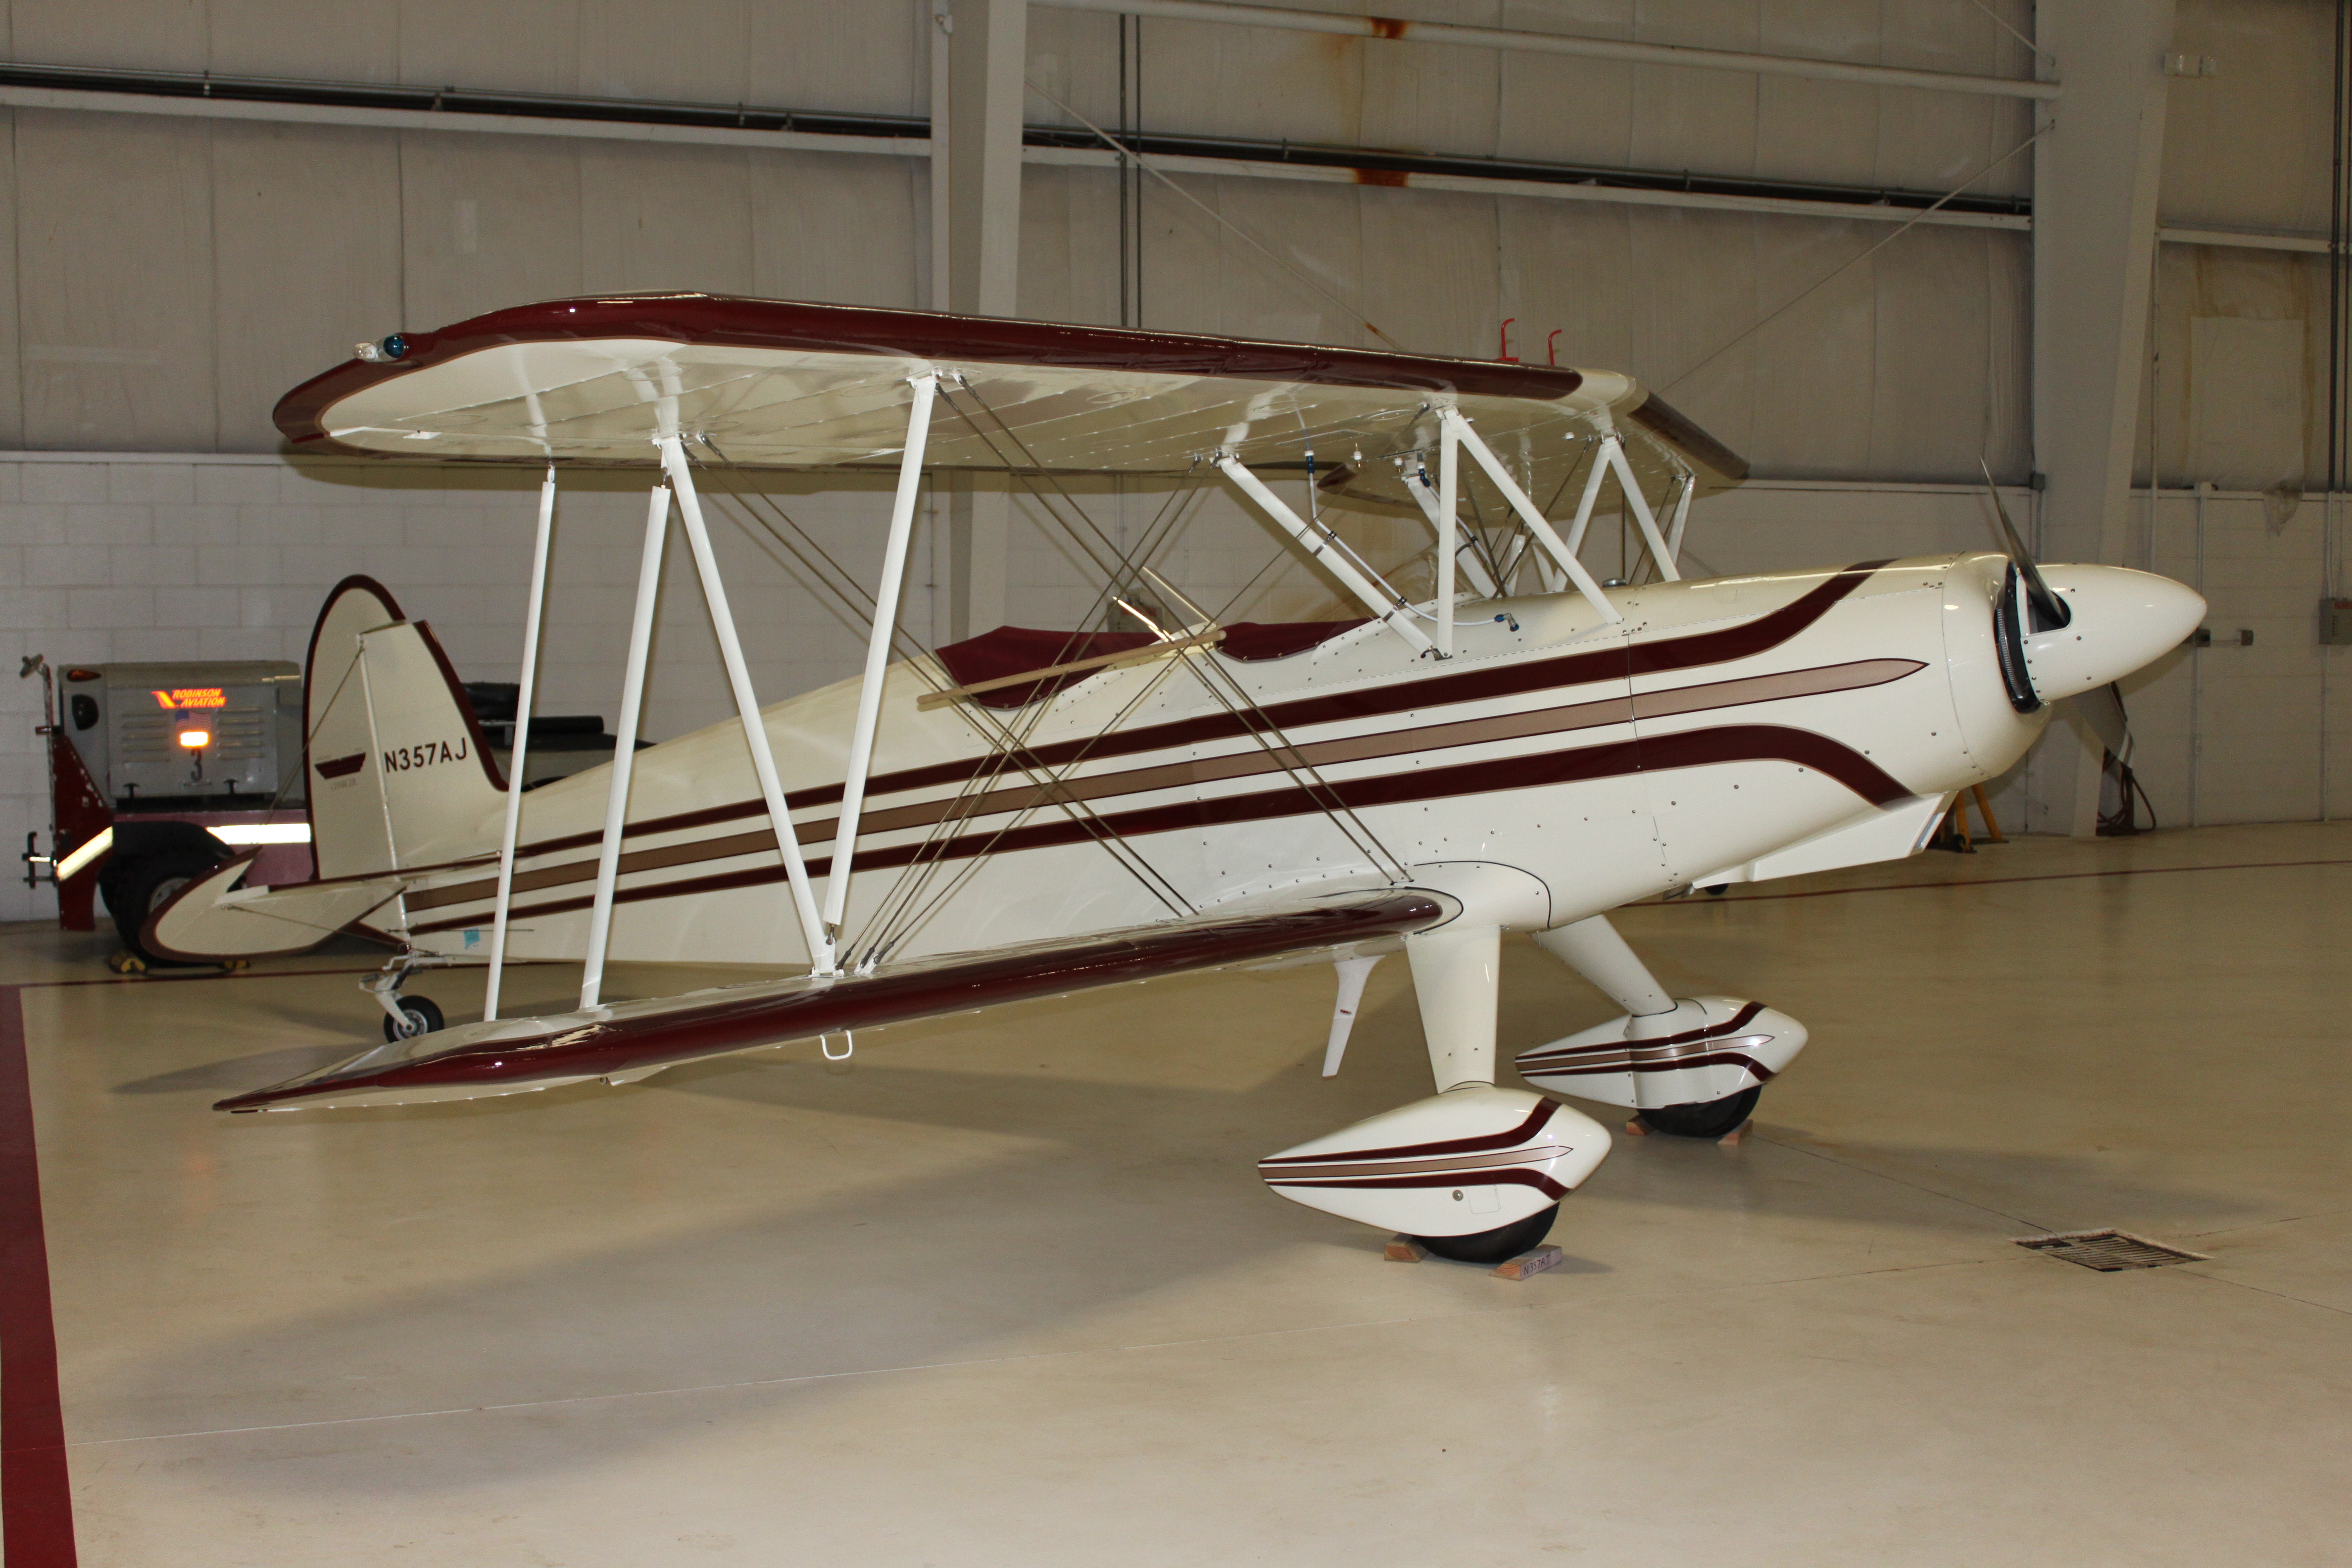
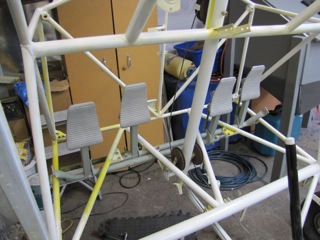
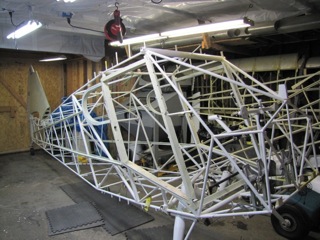
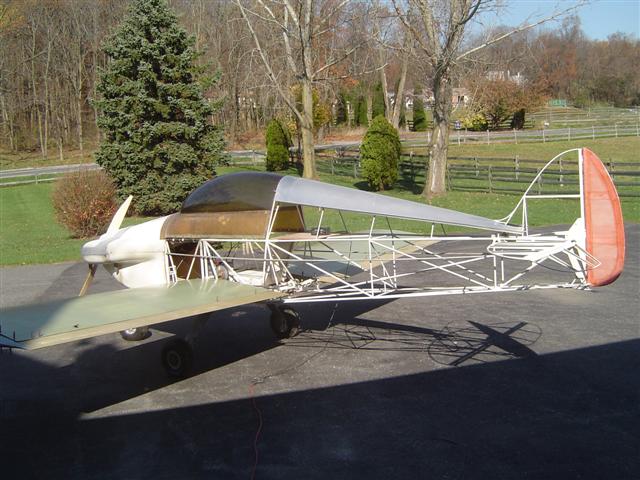
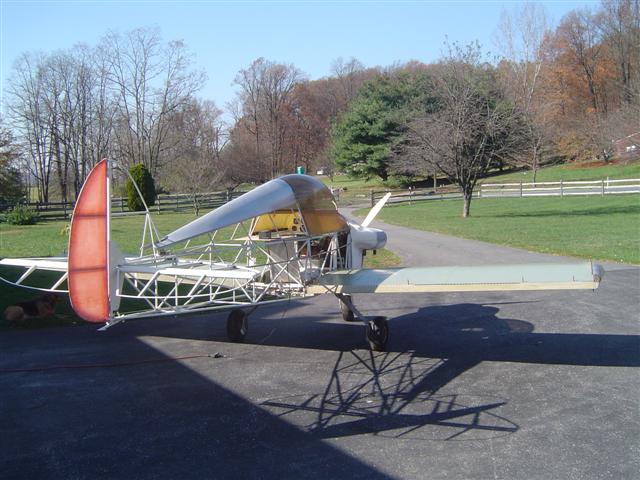
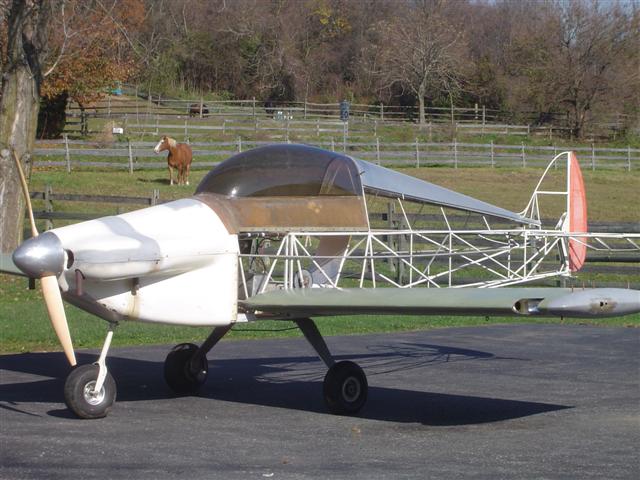
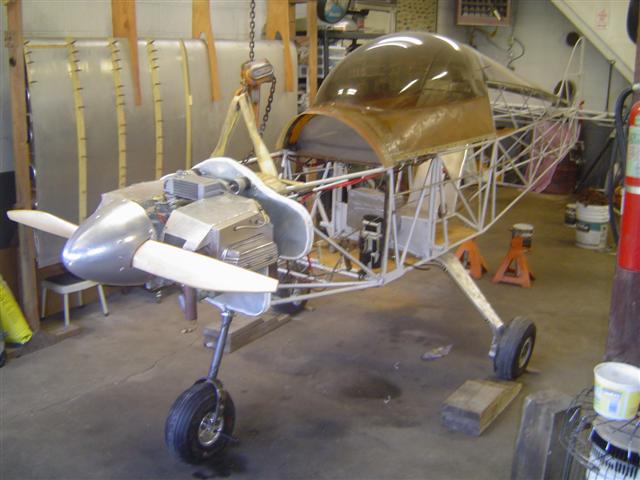
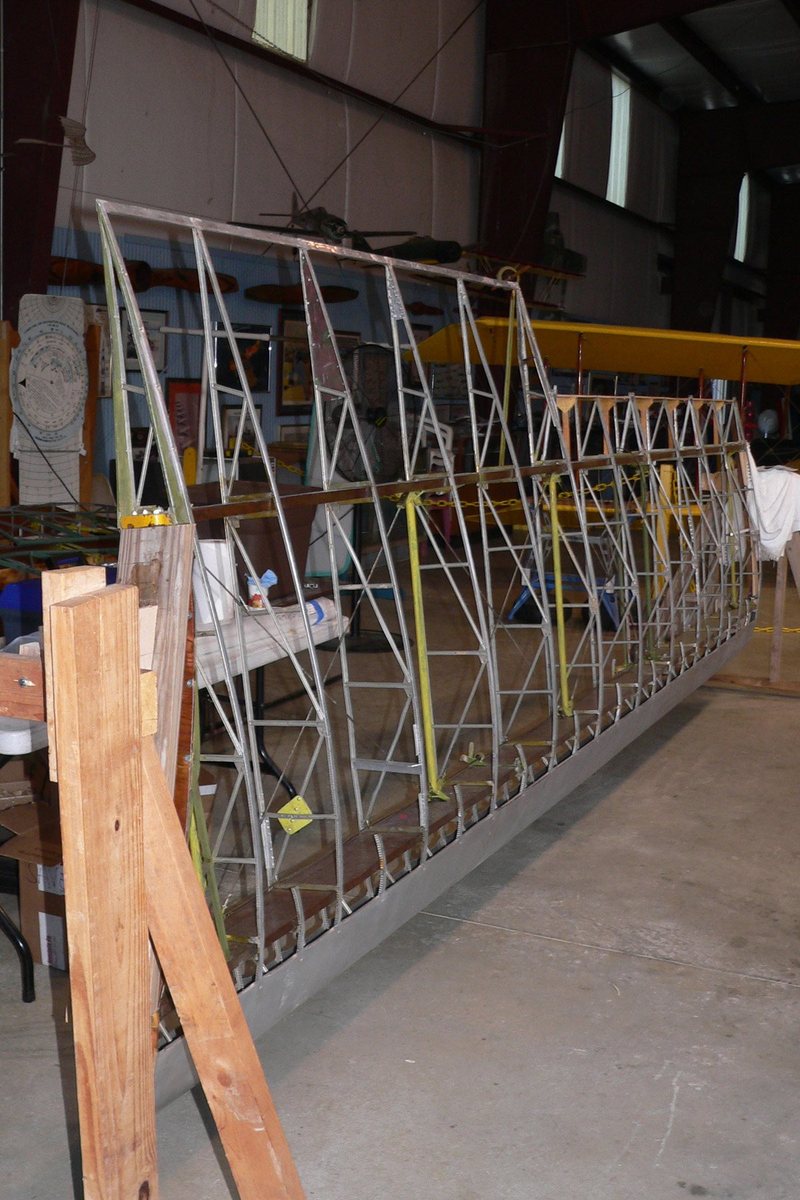
Marquart MA-5 ChargerBack in 1975 I started building this great looking biplane. I was owner of a small aircraft repair shop and figured it wont take long to complete this aircraft. This is a plans built aircraft with 10 degree sweepback wings and I soon found out that there was more to this than I originally thought. Im sure many builders share the same story. By 1978 I had the wings built and many key components purchased including the engine, flying wire set, prop( new, $360) and most instruments. Now I had changed jobs and the new job was very demanding so the aircraft was put on the back burner and stored. It wasnt until 1990 that work commenced again, on the fuselage, tail feathers and their covering. At the beginning of 1993 there was another job change and another back burner again for the project. September of 2009 I had finally retired from being a Director of Maintenance and officially directed all of my time to completing the Charger. I have enclosed a photo of the Charger being assembled at Chester Airport prior to covering the wings, to make sure everything fits. I figured that in one year of full time work this baby would be flying. Well, my estimate was way off and it made its first flight November 9th 2011, almost two full years from preliminary assembly! Being a plans built aircraft means very few components are available and if it is not available, you build it! Need an air scoop for your cowl; make the wood mold, buy the Rutan Bi-directional glass cloth, mix the epoxy resin and form the layers. The education, confidence and satisfaction you get from being the manufacturer is hard to beat. The second photo is the aircraft in the hangar just after its first flight at New Havens Tweed Airport. Completing this project was a major milestone and anyone involved with building an aircraft should persevere and get it airborne. My wife is happy now that the house is no longer a parts depot. I thank the folks at Aircraft Spruce for having a great inventory, competitive prices and a super staff, all contributing to getting the job done. Now that the cold has set in, the Charger is resting in the hangar waiting for spring. Come May, Ill be boring holes in the sky around New England. |
||||||||||||||||||
|
|
|
1946 Stinson 108-1It has been a lifelong goal to take up flying again since I took lessons as a teenager and an opportunity came up to get a project plane from my cousin that looked like something I could do. We purchased it and are now restoring a 1946 Stinson 108-1 that was flown and then a rebuild started over 25 years ago that got stalled. Now, my brother and I are picking up the project as the new owners. We have no airplane building experience but a lot of mechanical experience and engineering that we are applying to this project. Building this airplane is a lot like a puzzle because what we got was a rolling fuselage and a lot of boxes of parts. Some new parts, some not. However, with todays information technology we are able to get information almost immediately to answer our questions as we progress with the assembly. With the support of family, we have constructed a converted garage into a makeshift hangar at our house and are basically building it in the garage. So far we have installed most of the control cables and are working on frame formers, electrical, and interior as we prepare to get it ready for cover. I took a class on airplane fabric installation and through research and Stinson airplane club and groups are finding answers to our questions during our assembly. We have a build blog for other to follow and enjoy sharing this new experience with our friends and fellow builder/pilots. It is very satisfying to see the parts come out of boxes and off the floor an onto the airframe. If no delays, we hope to see it completed next year. Don G. |
||||||||||||||||||
|
|
|
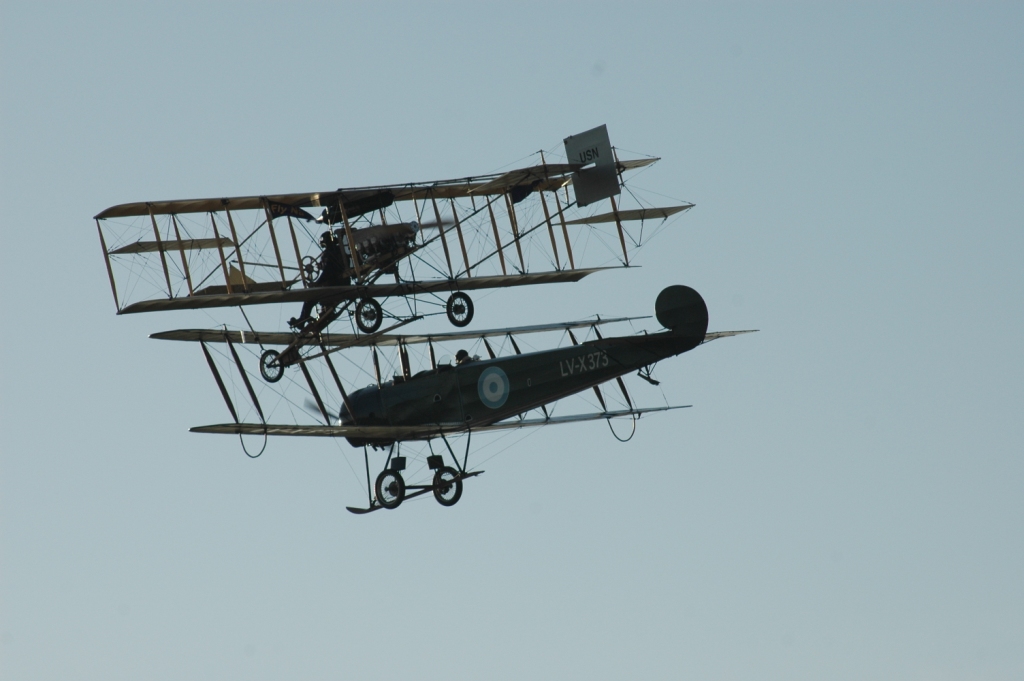
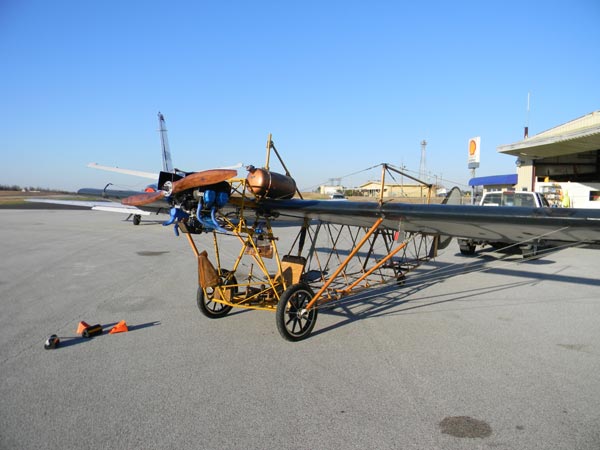
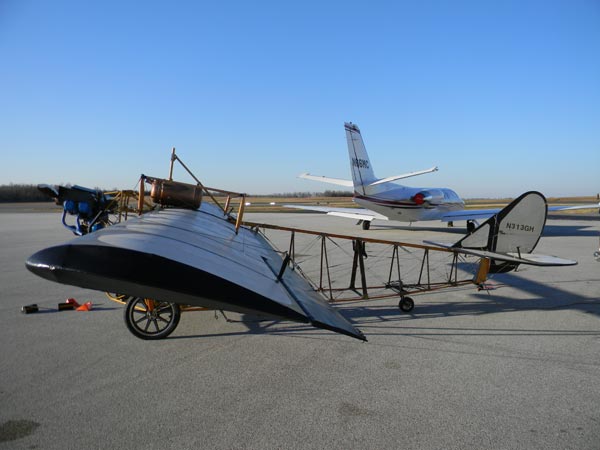
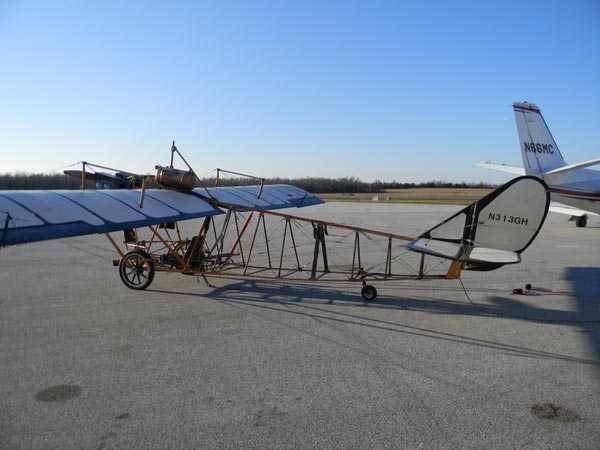
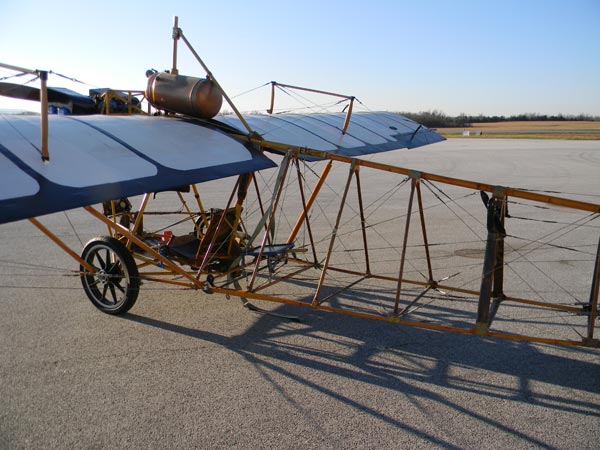
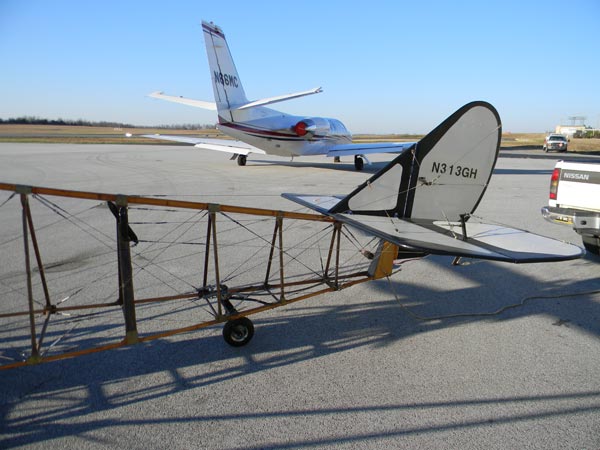
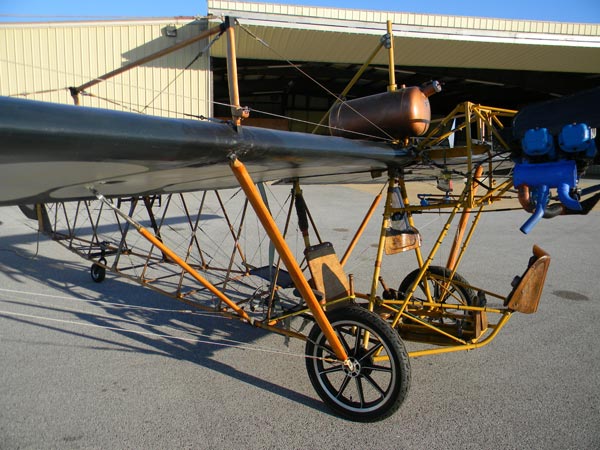
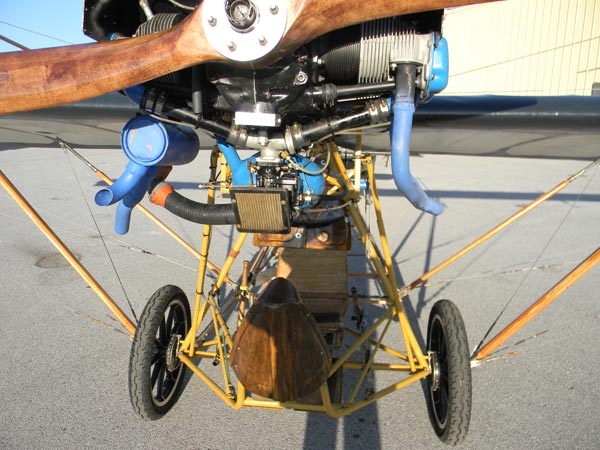
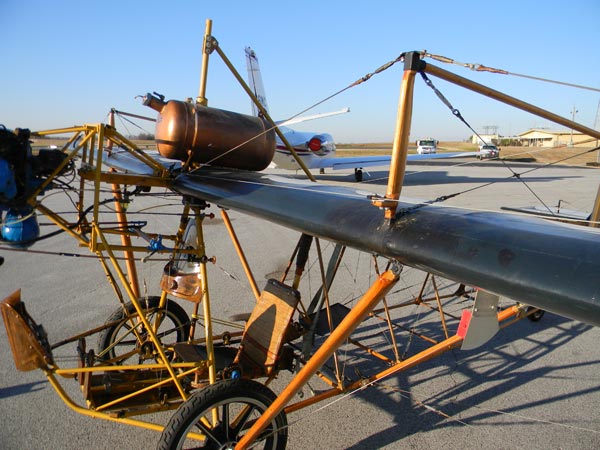
1911 Curtiss Pusher Replica In 2008 I began building a replica of the 1911 Curtiss Pusher used by Eugene B Ely to make the first arrested shipboard landing aboard USS Pennsylvania. Ely did this on 18 JAN 1911, marking one of the most significant dates of the birth of Naval Aviation. The goal was to build the replica and fly it to as many Centennial of Naval Aviation celebrations as possible in 2011. I am proud to say that a very small Curtiss Crew of volunteers pulled this off Mission Accomplished! Thanks for considering this project in your contest, and thanks for your continuing support of General Aviation! Regards,
|
||||||||||||||||||
|
|
|
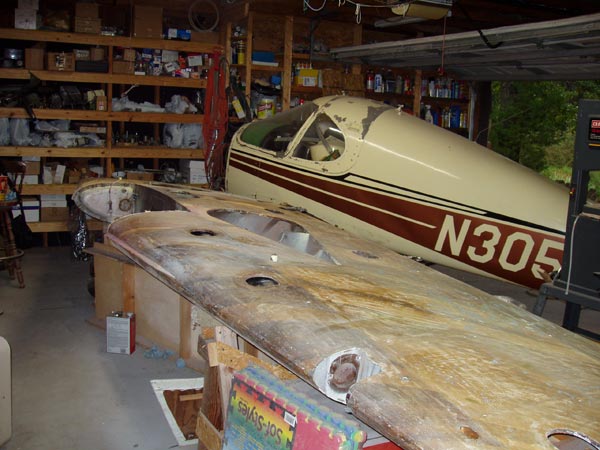
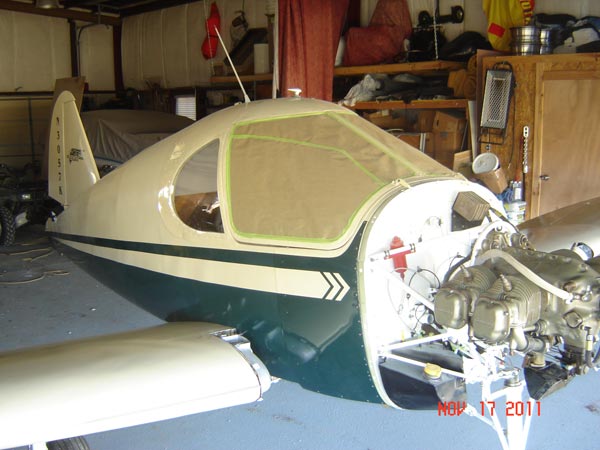
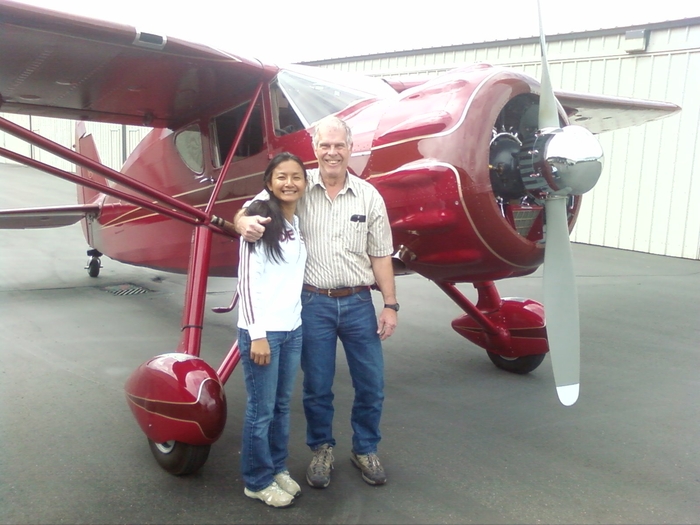
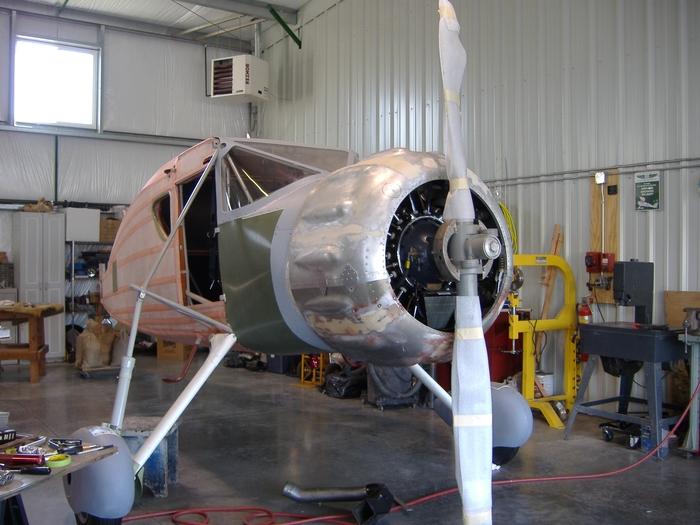
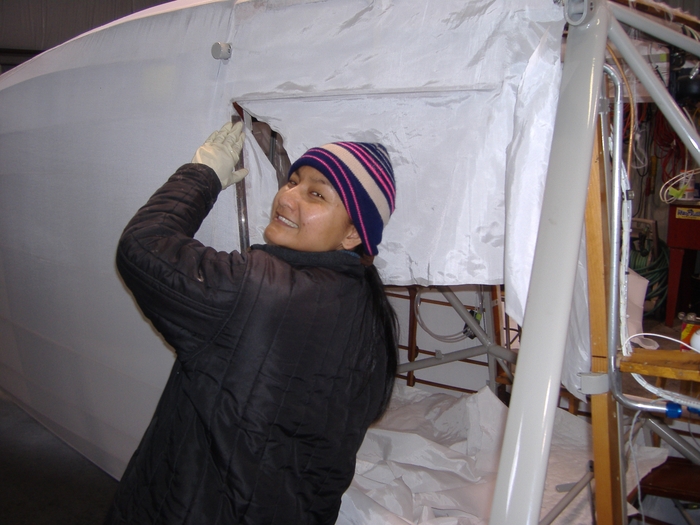
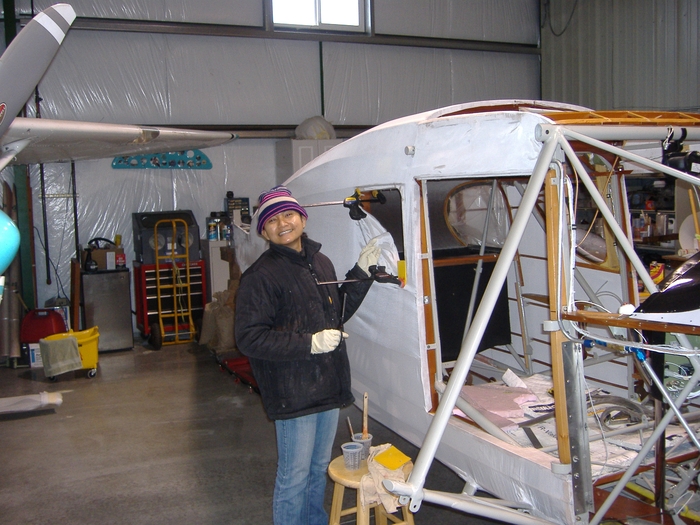
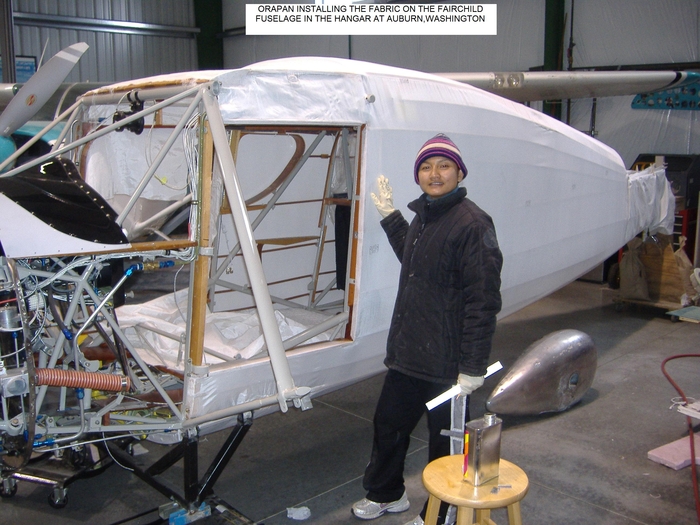
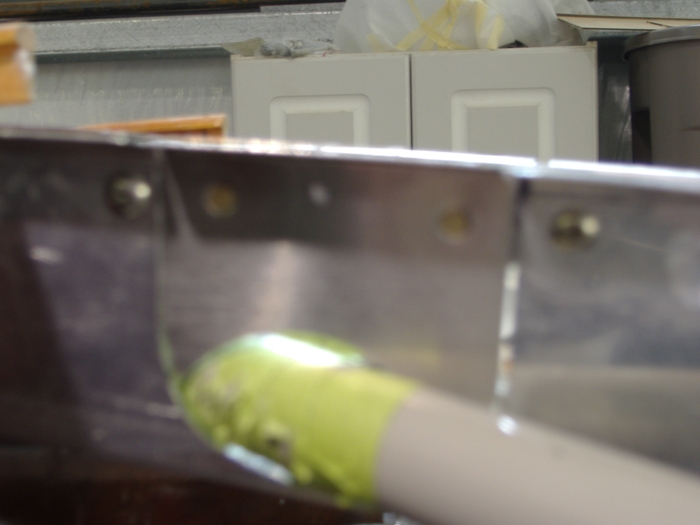
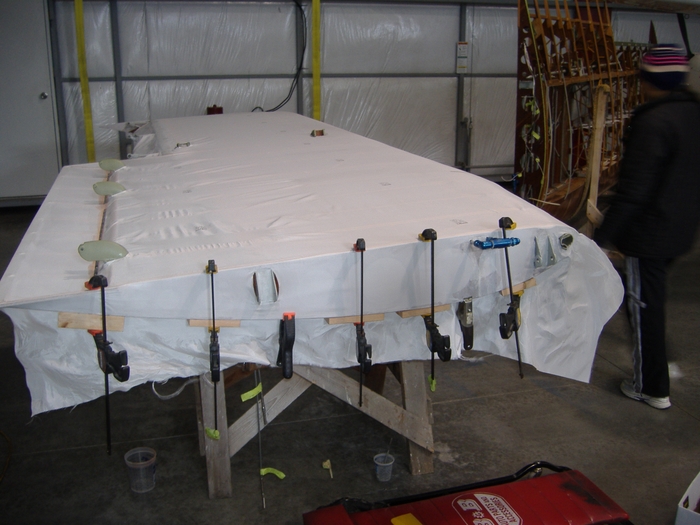
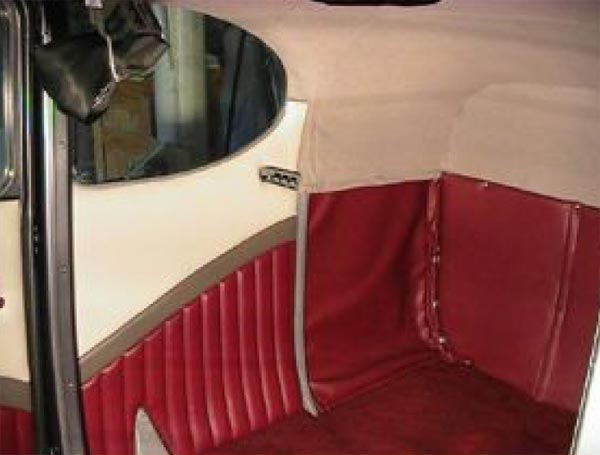
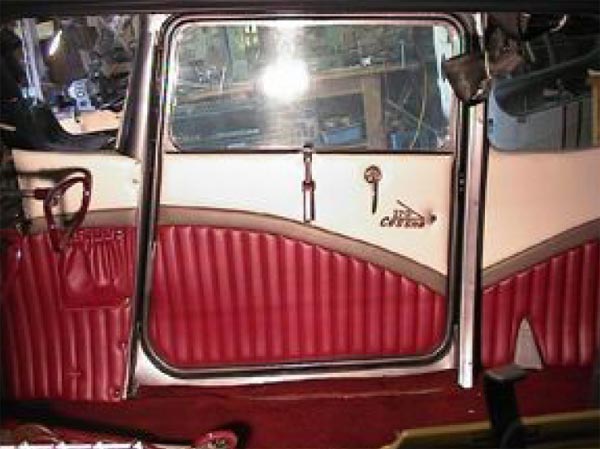
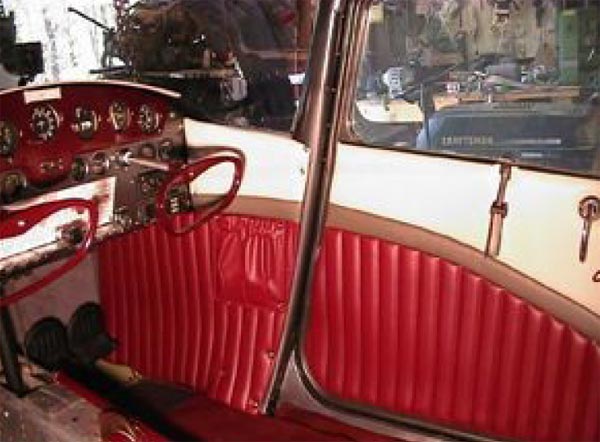
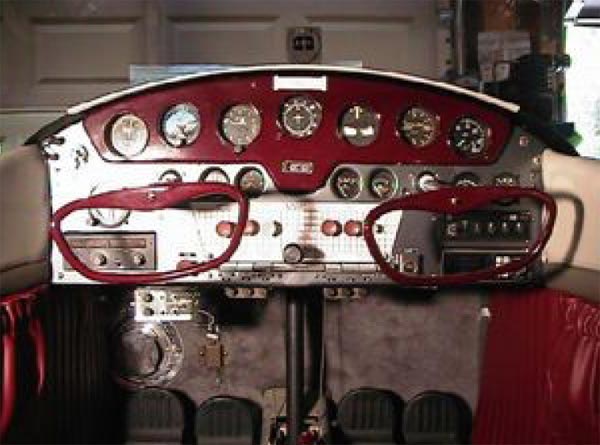
Fairchild 24W-46Dear Aircraft Spruce,
I had married a lady in Thailand and brought her back to the states with me. She had never rode in a small aircraft before, let alone work on one. Lucky for me, she was a fast learner. We took the bare fuselage from scratch to a flying aircraft. The aircraft had been 17 years since it last flew. We removed the Warner engine and installed a Jacobs 245 horse power engine. The majority of parts, insturments used in the restoration were purchased from Aircraft Spruce. The boot cowling was hand made and the engine cowling was made from a New Waco cowling, modified to fit the Fairchild fuselage and boot cowling. My Thai wife could speak and write some English, but a lot of the aviation terminology she did not understand. When it came to installing the covering, we went with the POLY-FIBER System in its entirety. My wife had a little problem with reading and understanding the Poly-Fiber Manual, but with the help of the video, she was able to figure it out. I never tied the first modified seine knot, she did them all. There were 376 knotes per wing. My FAA Inspector said it was the best fabric job he had ever seen. Frank Rogers |
||||||||||||||||||
|
|
|
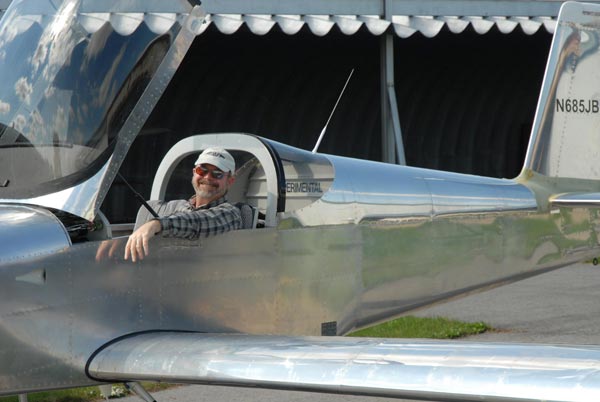
Van's RV-9AFirst Flight of my Van's RV-9A on 10/04/2011! 1/2 hour flight went fine. Had a great ground crew to keep me on track. N685JB was started in April 2009 and moved along quickly as I went with the quick build option and am retired. Thanks also to Aircraft Spruce for being my primary "go to source" for parts that didn't come with the kit from Van's (and for the parts I miss-placed). I really appreciate the vast selection of parts and the fact that if ordered before 5pm they'll ship that day. UPS ground packages often made it to my home in 2 days.. John Bowen |
||||||||||||||||||
|
|
|
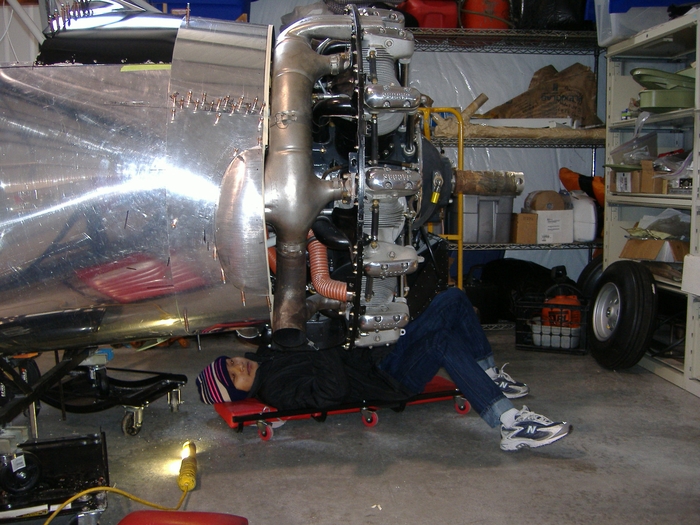
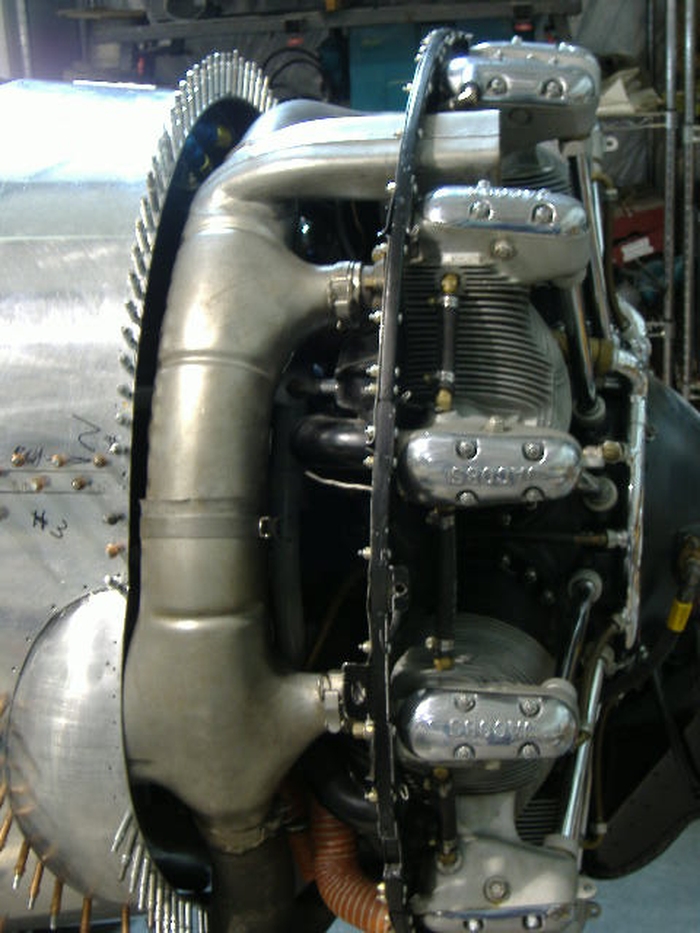
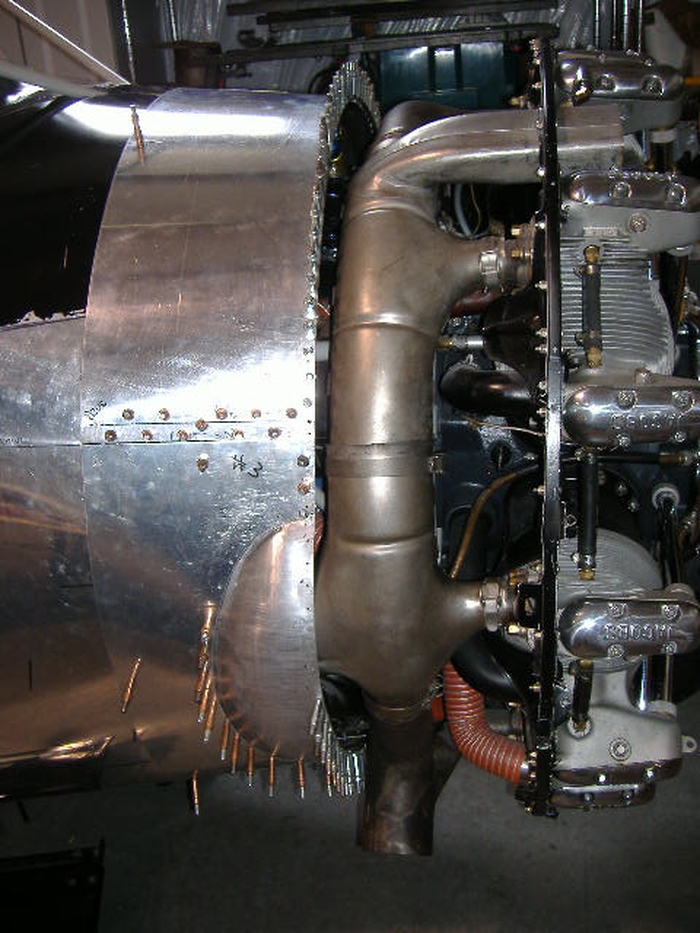
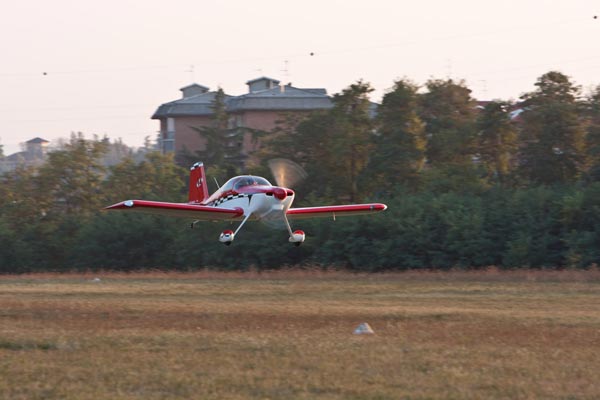
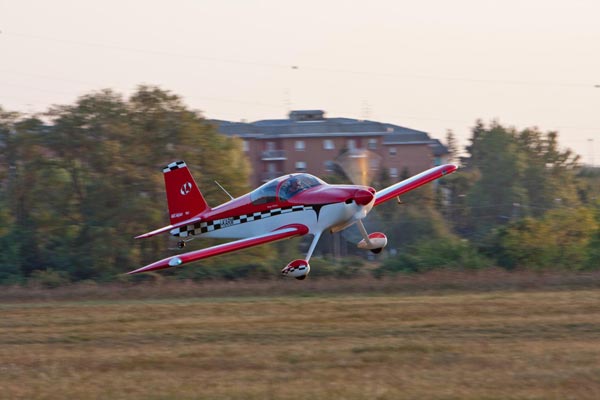
OI-39026 months of work, OI-390 engine aerobatics - Italy |
||||||||||||||||||
|
|
|
Early Bird Type PlaneAround five years ago, I set out to experience the early days of flight (as best as I could) by designing and building a plane that could have come from that era with materials that generally could have came from that time period. What seemed like a rather simple task at first, became a five year odesy in learning much about what aviation really is. I have been a pilot since 1973 and a commercial pilot for around 15 years or so. Even though many materials came from the local hardware store and lumber yard, I did purchase all other supplies from Aircraft Spruce and have been a customer for many years. I have enclosed several photos of the plane which draws visitors almost daily to "look it over." I have had some help from different friends, but that was limited. The plane has flown fairly well and has handling characterics that you would expect for such a drag burdened plane. It weighs around 630 lbs dry and is powered by an older model A-65 Cont. engine which I overhauled myself (with some help). The plane is very strong inspite of it's frail apperance and has be landed with power because the glide ratio is all but non-existent. This causes some pretty hard landings at times, but I am getting better. I still have some disharmony between the engine and prop which will have to be corrected, but I expect to have it on the flyin circuit by this Spring. Over-all, I have enjoyed this experience and feel I have gained new insight into the problems encountered by the early birdmen in designing a flyable flying machine and in the curde handling characterics of this type of design. |
||||||||||||||||||
|
|
|
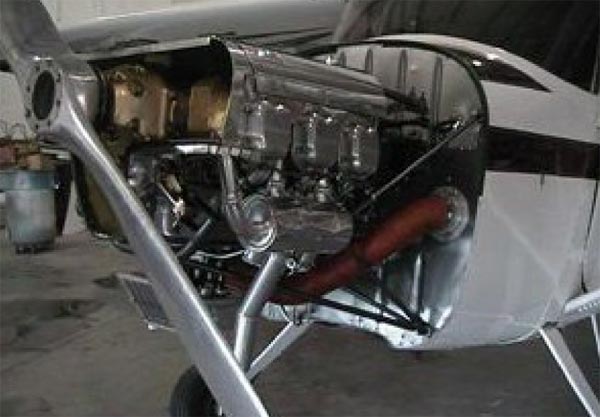
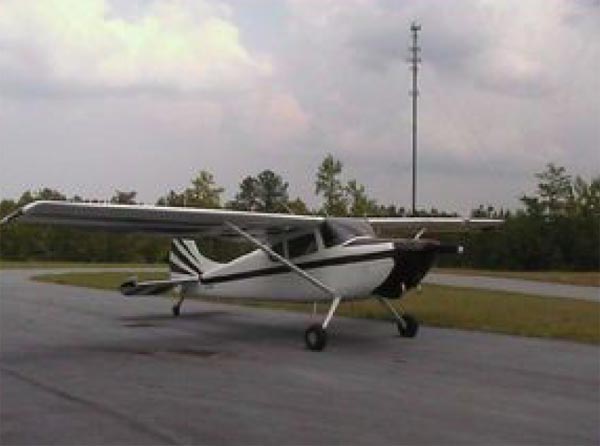
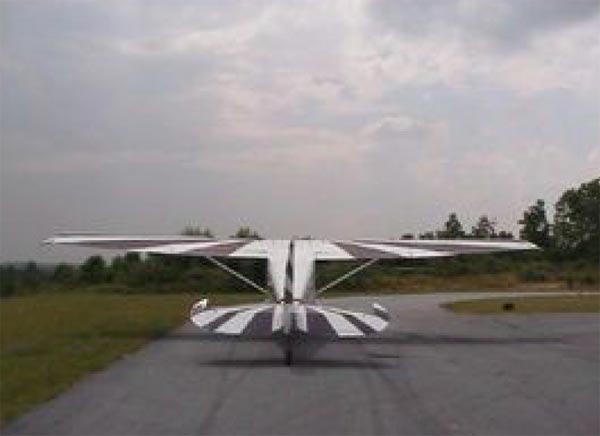
Zenith CH801Dear People at Aircraft Spruce, I appreciate the fact you are helping people complete their planes with the $500 monthly drawing. I am submitting my plane project to be part of the drawing. Thank you. Ken Johnson |
||||||||||||||||||
|
|
|
Exploratory Aircraft MechanicsStudent Exploratory Aircraft Mechanics |
||||||||||||||||||
|
|
|
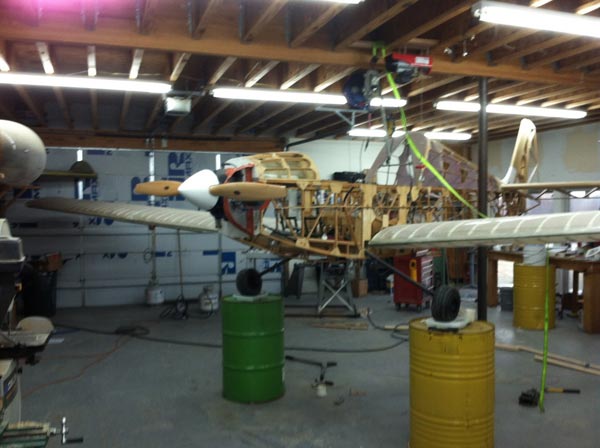
SoneraiThe Franklin Engine that was with the airframe when I purchased it has been removed. An 1835cc Volkswagen Engine has been installed in its place.The Sonerai was designed to have a Volkswagen engine. The wings are finished, cowlings are being painted now (by me). Kline, Timothy |
||||||||||||||||||
|
|
|
Breezy N5150I completed my Breezy in Dec. 2005 after four years of part time fabrication and construction. The chromoly tubing, hardware, covering supplies, paint and all of the instrumentation was purchased through Aircraft Spruce during the build period. The aircraft is a blast to fly and has even made it into a few flying magazines as a featured article. Pacific Flyer Aviation News Aug. 2006, Air & Space Magazine, Jan. 2008 and Kitplanes Magazine, Oct. 2009. I highly recommend building an aircraft from plans, it is very gratifying work. Matt Hlavac |
||||||||||||||||||
|
|
|
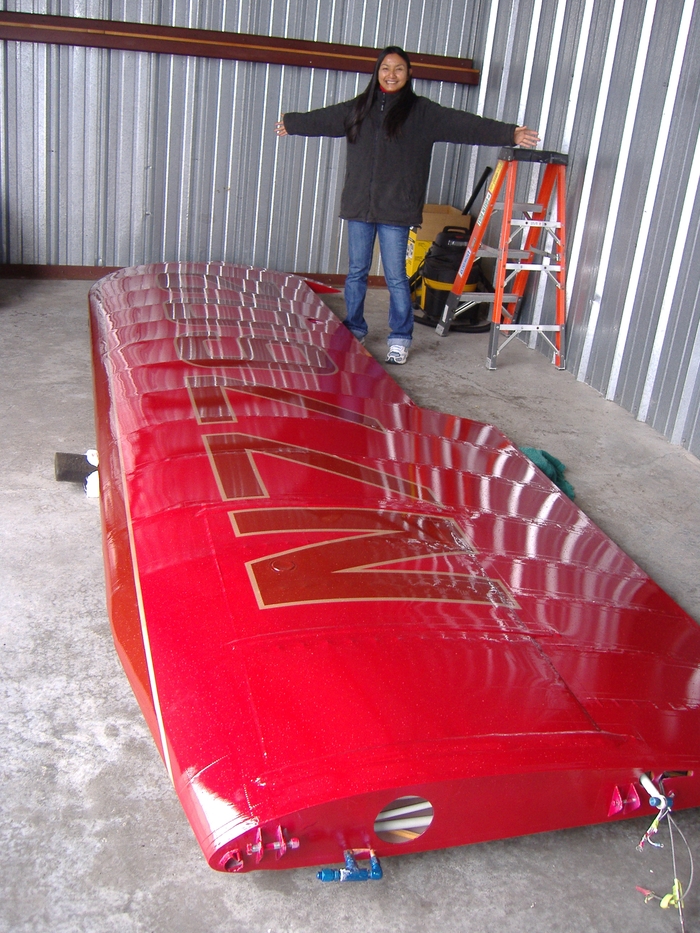
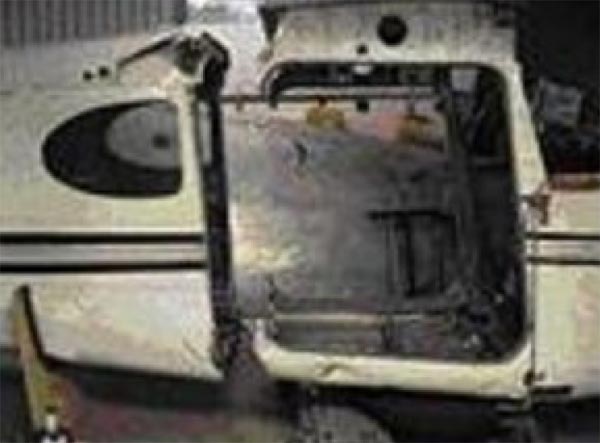
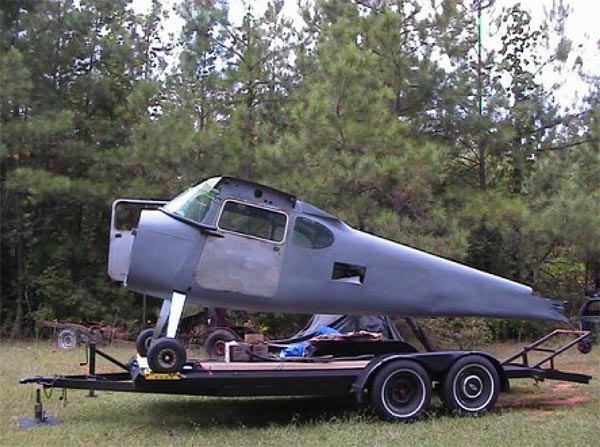
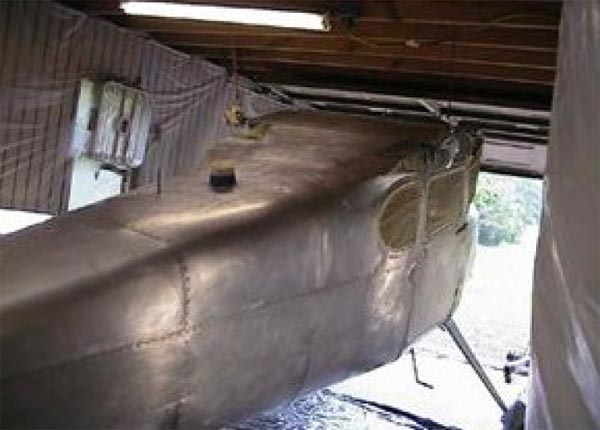
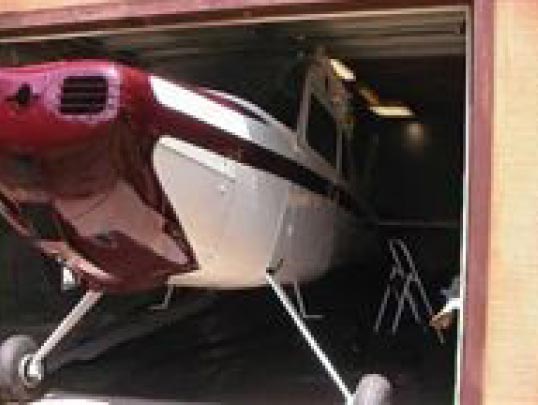
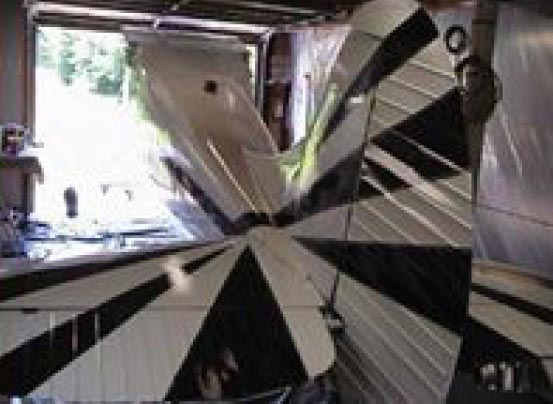
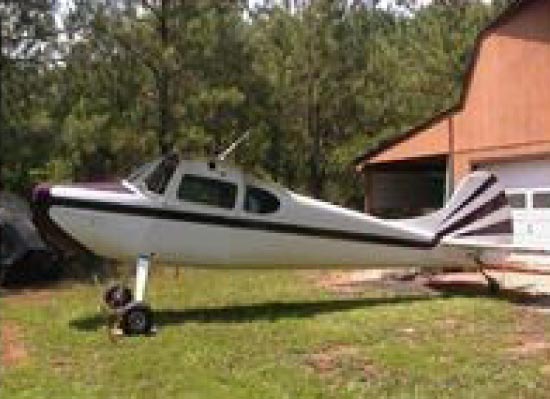
The Rebirth of A Cessna 170B
|
||||||||||||||||||
|
|
|
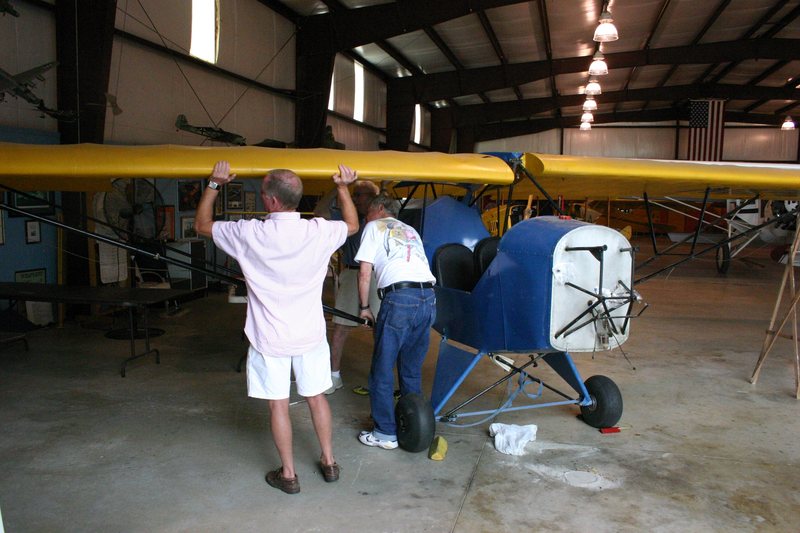
1932 E2 Taylor CubWe all have a project that has just been hanging around, but for whatever reason, never seem to be able to get around to. For us here at the Western North Carolina Air Museum that project was our 1932 Taylor E-2 Cub which was literally hanging around: from the rafters in our museum hanger. For years the restoration of this rare aircraft has been on our list of things to do, but there always seemed to be some other thing that had to come first. Finally this June after our yearly Airfare, it was decided that this was to become a top priority. The first thing was to get the plane on the ground. So on Wednesday, June 8, we slowly lowered it down to the floor. No sooner had the weight of the plane settled on its landing gear, then we heard a loud pop. The bungee on the landing gear was so dry that it snapped allowing the gear to spread out until the plane looked like a beached turtle. This was just the start. Expand |
||||||||||||||||||
|
|
|
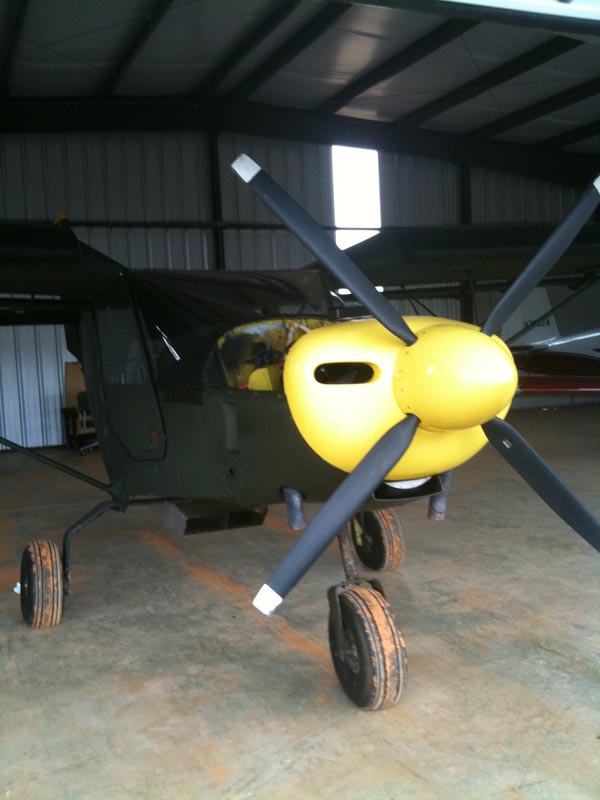
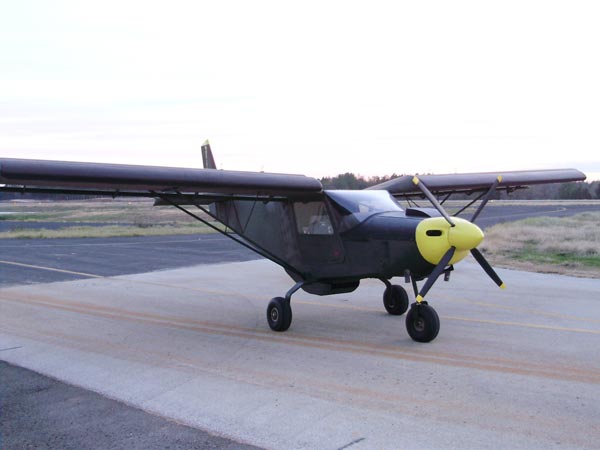
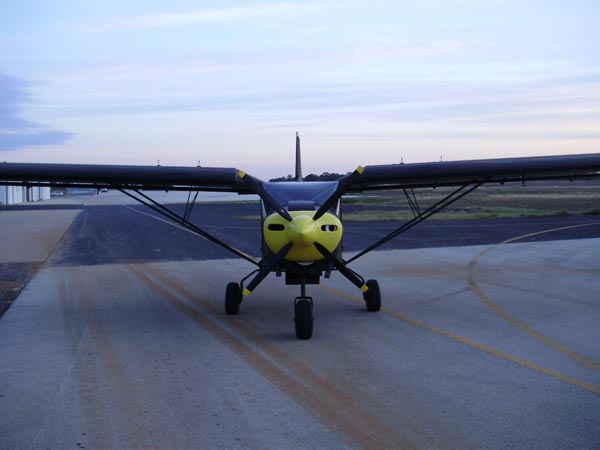
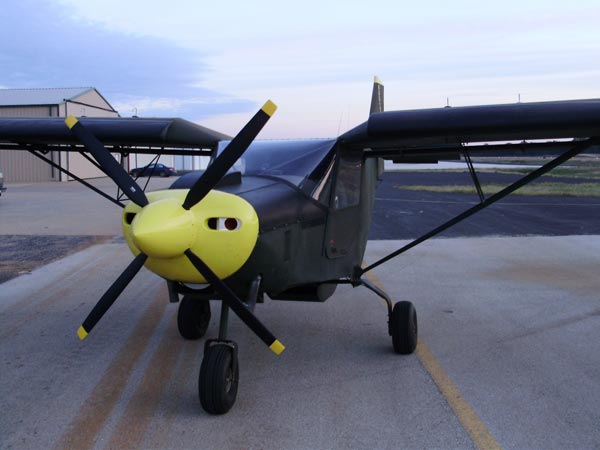
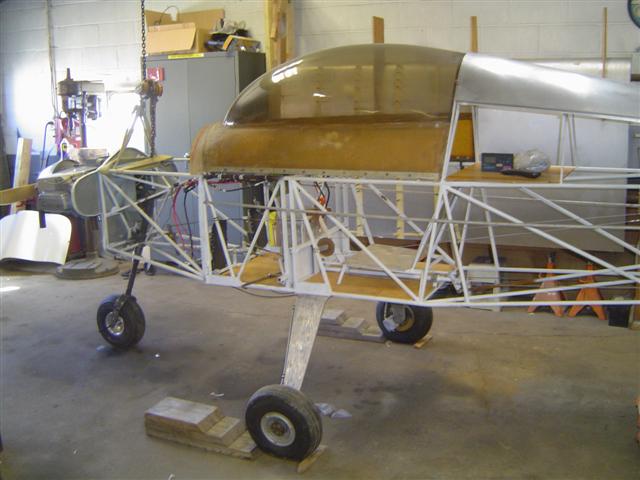
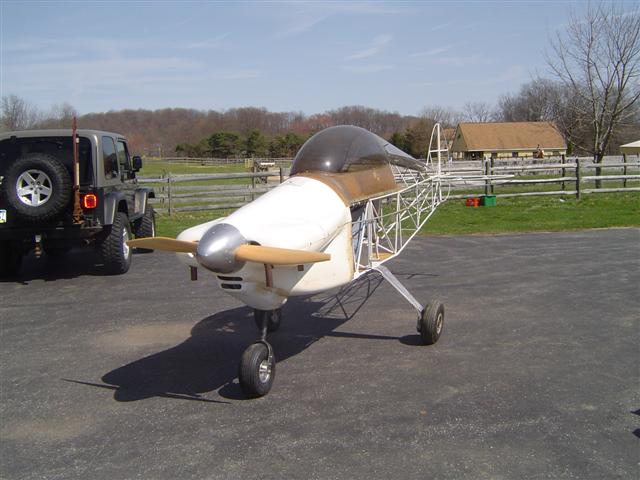
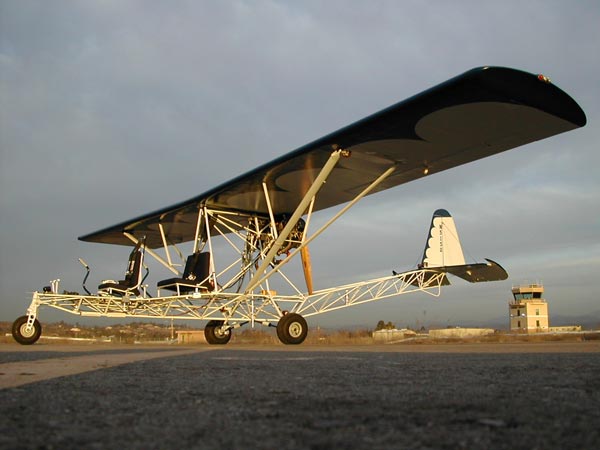
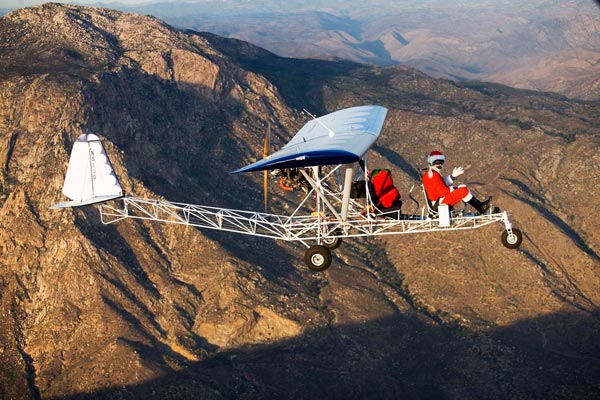
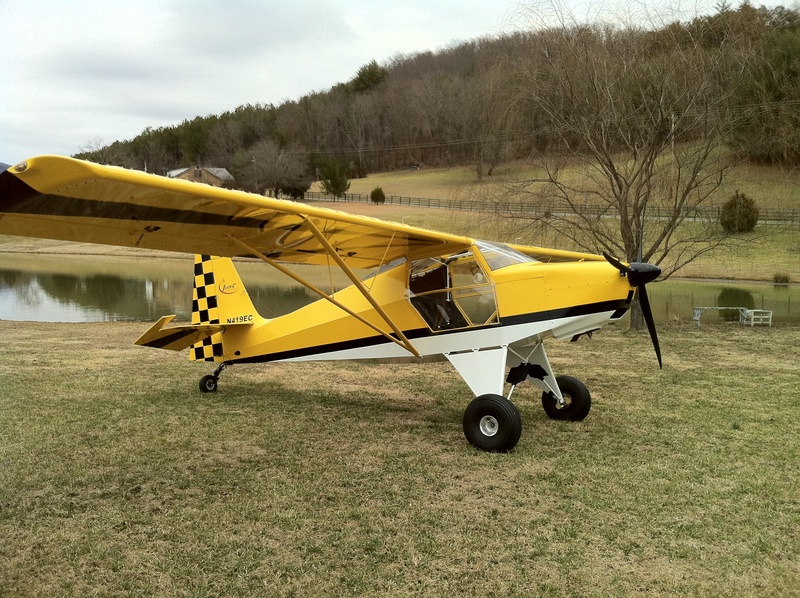
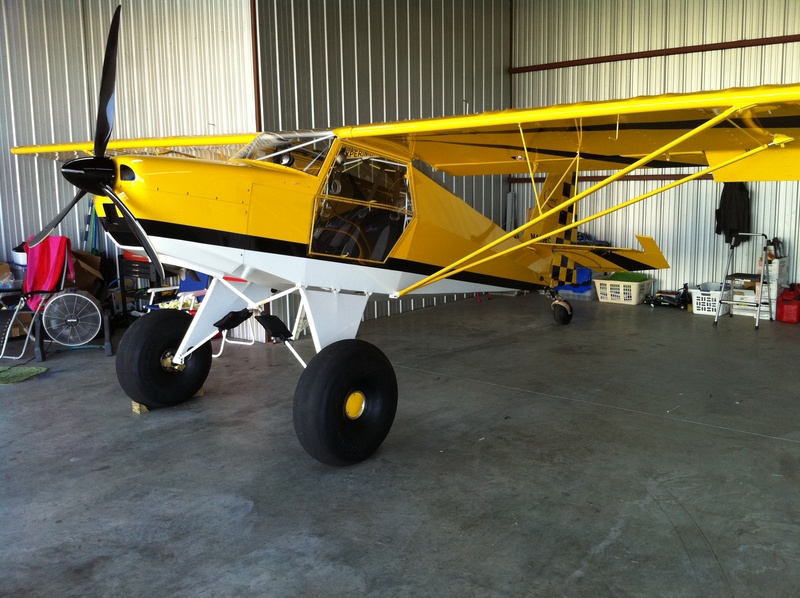
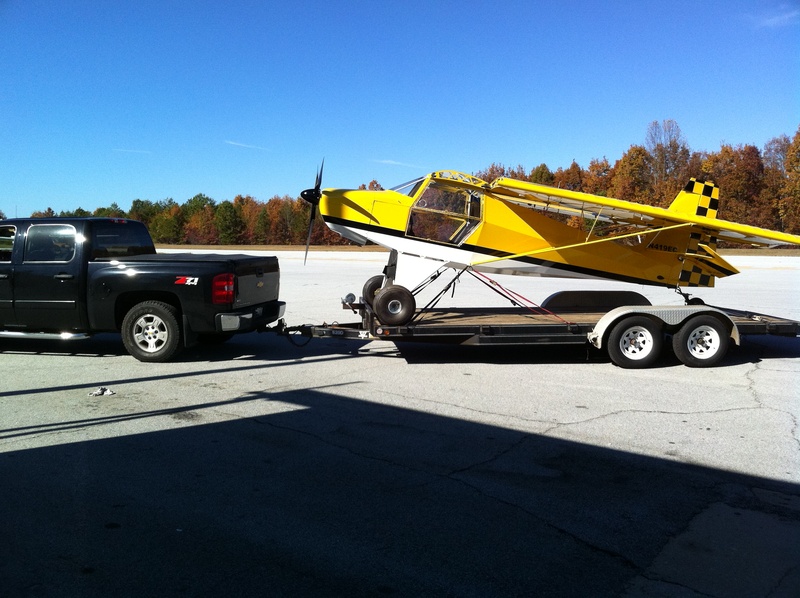
Completed, first flight November 2010. Powered by Rotax 912 uls. Built at the Wahalla, SC factory with guidance from the great guys at Just Aircraft. Project took alittle over a year to complete. Fun airplane to build and to fly. Thanks Aircraft Spruce for supplying many of the parts. Arnie Koriakin, Winston Salem, NC |
||||||||||||||||||
|
|
|
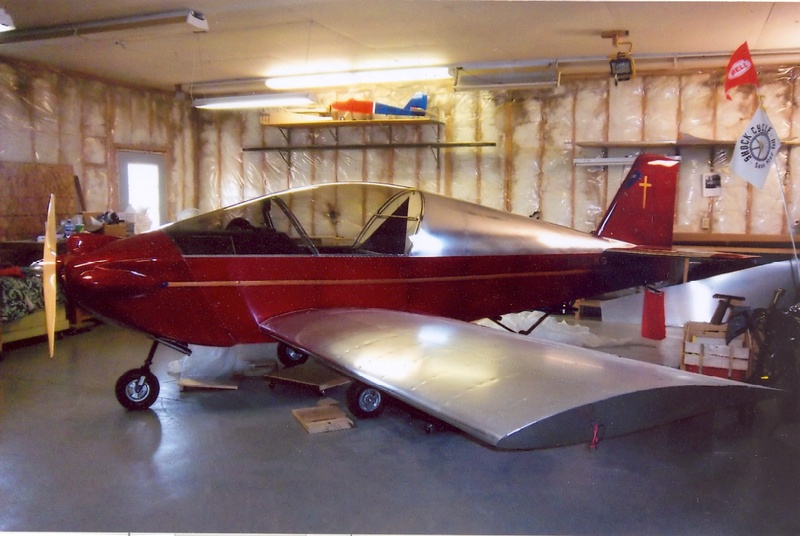
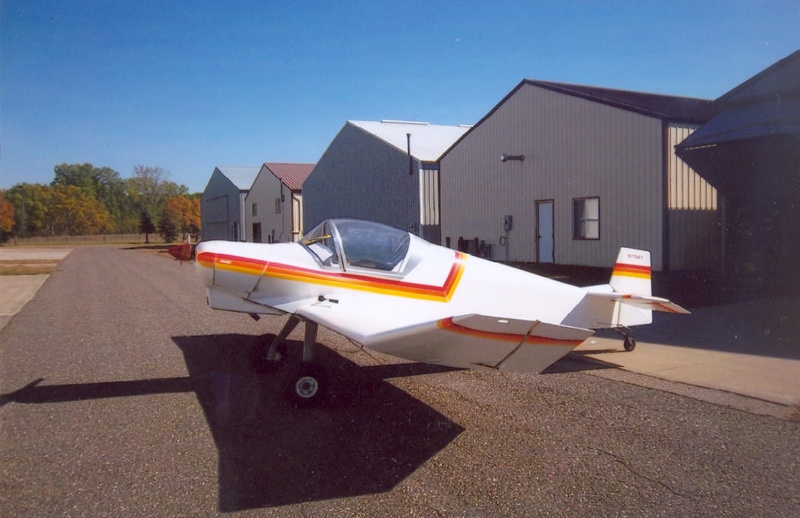
I've done business with your company for over 20 years now and been treated with excellence. I have visited your store in California and Georgia and been treated the same. Enclosed are pictures of the 2 aircraft you helped me build. The Jodel D-9 (Now for sale) first flew in 1999. The Sonex is new and will fly this year. Both were built from scratch, not a kit. |
||||||||||||||||||


PREVIOUS | NEXT PAGE |